Okta (SAML)
Cloudflare Zero Trust can integrate SAML with Okta as an identity provider.
Set up Okta as a SAML provider
To set up SAML with Okta as your identity provider:
On your Okta admin dashboard, navigate to Applications > Applications.
Click Create App Integration.
In the pop-up dialog, select SAML 2.0 and click Next.
Enter an app name and click Next.
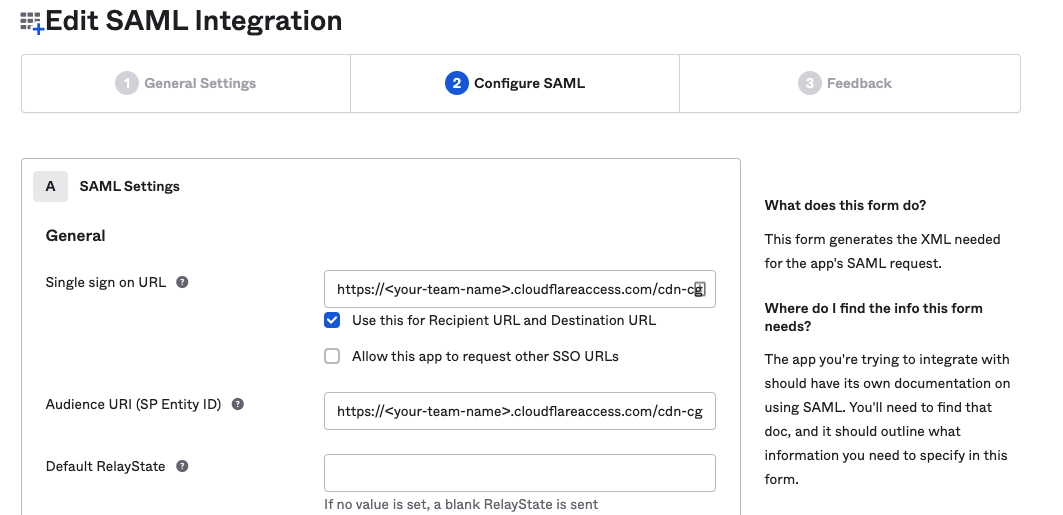
In the Single sign on URL and the Audience URI (SP Entity ID) fields, enter your team domain followed by this callback at the end of the path:
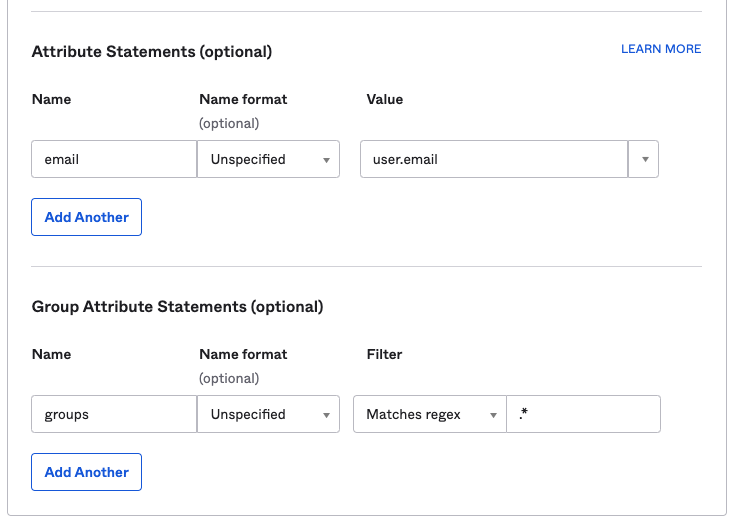
/cdn-cgi/access/callback. For example:https://<your-team-name>.cloudflareaccess.com/cdn-cgi/access/callbackIn the Attribute Statements section, enter the following information:
- Name: Enter
email. - Value: Enter
user.email.
- Name: Enter
(Optional) If you are using Okta groups, create a Group Attribute Statement with the following information:
- Name: Enter
groups. - Filter: Select Matches regex and enter
.*.
- Name: Enter
Click Next.
Select I’m an Okta customer adding an internal app and check This is an internal app that we have created.
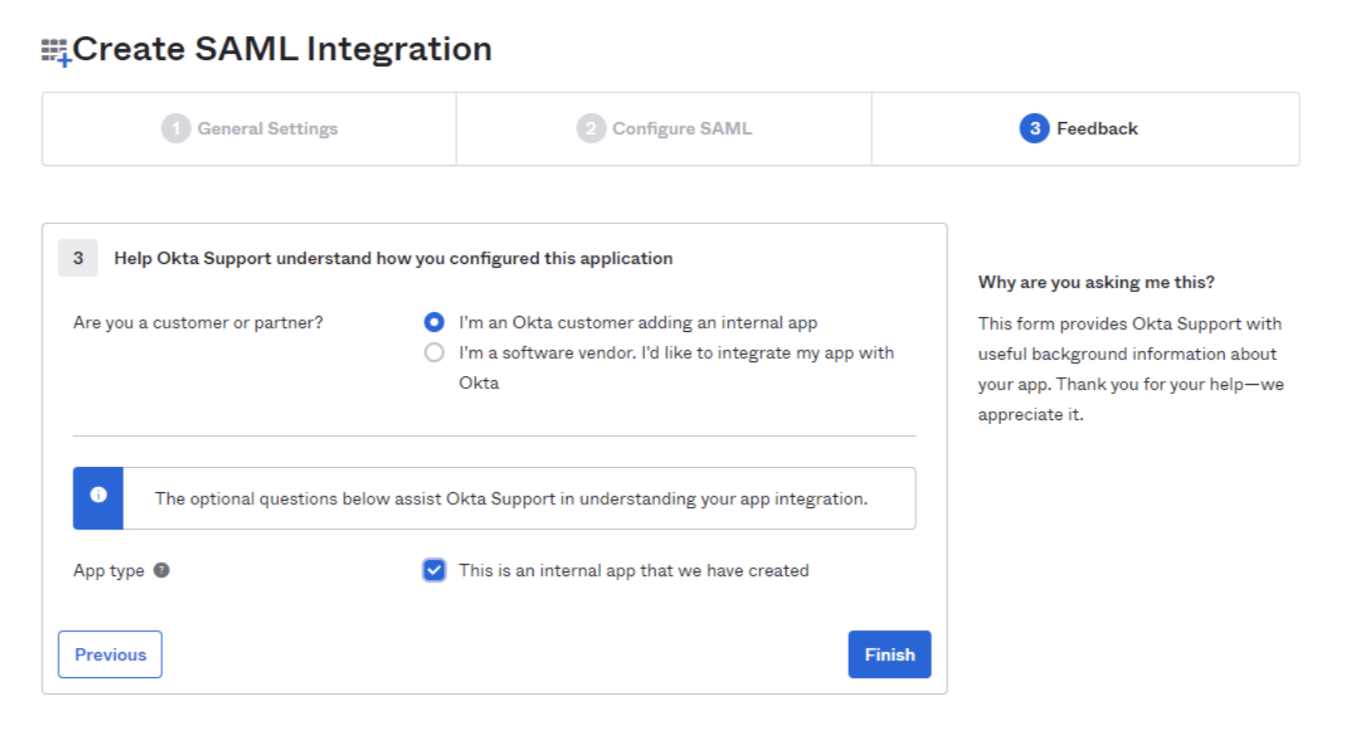
Click Finish.
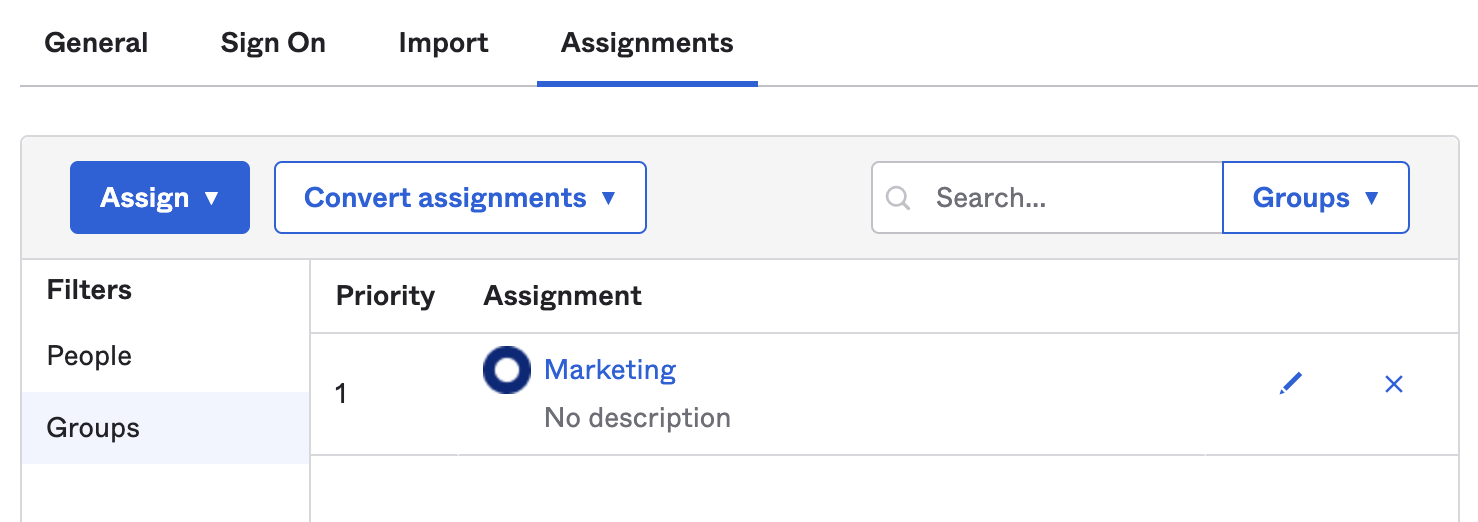
In the Assignments tab, click Assign and assign individuals or groups you want to grant access to.
Click Done. The assigned individuals and groups will display in the Assignments tab.
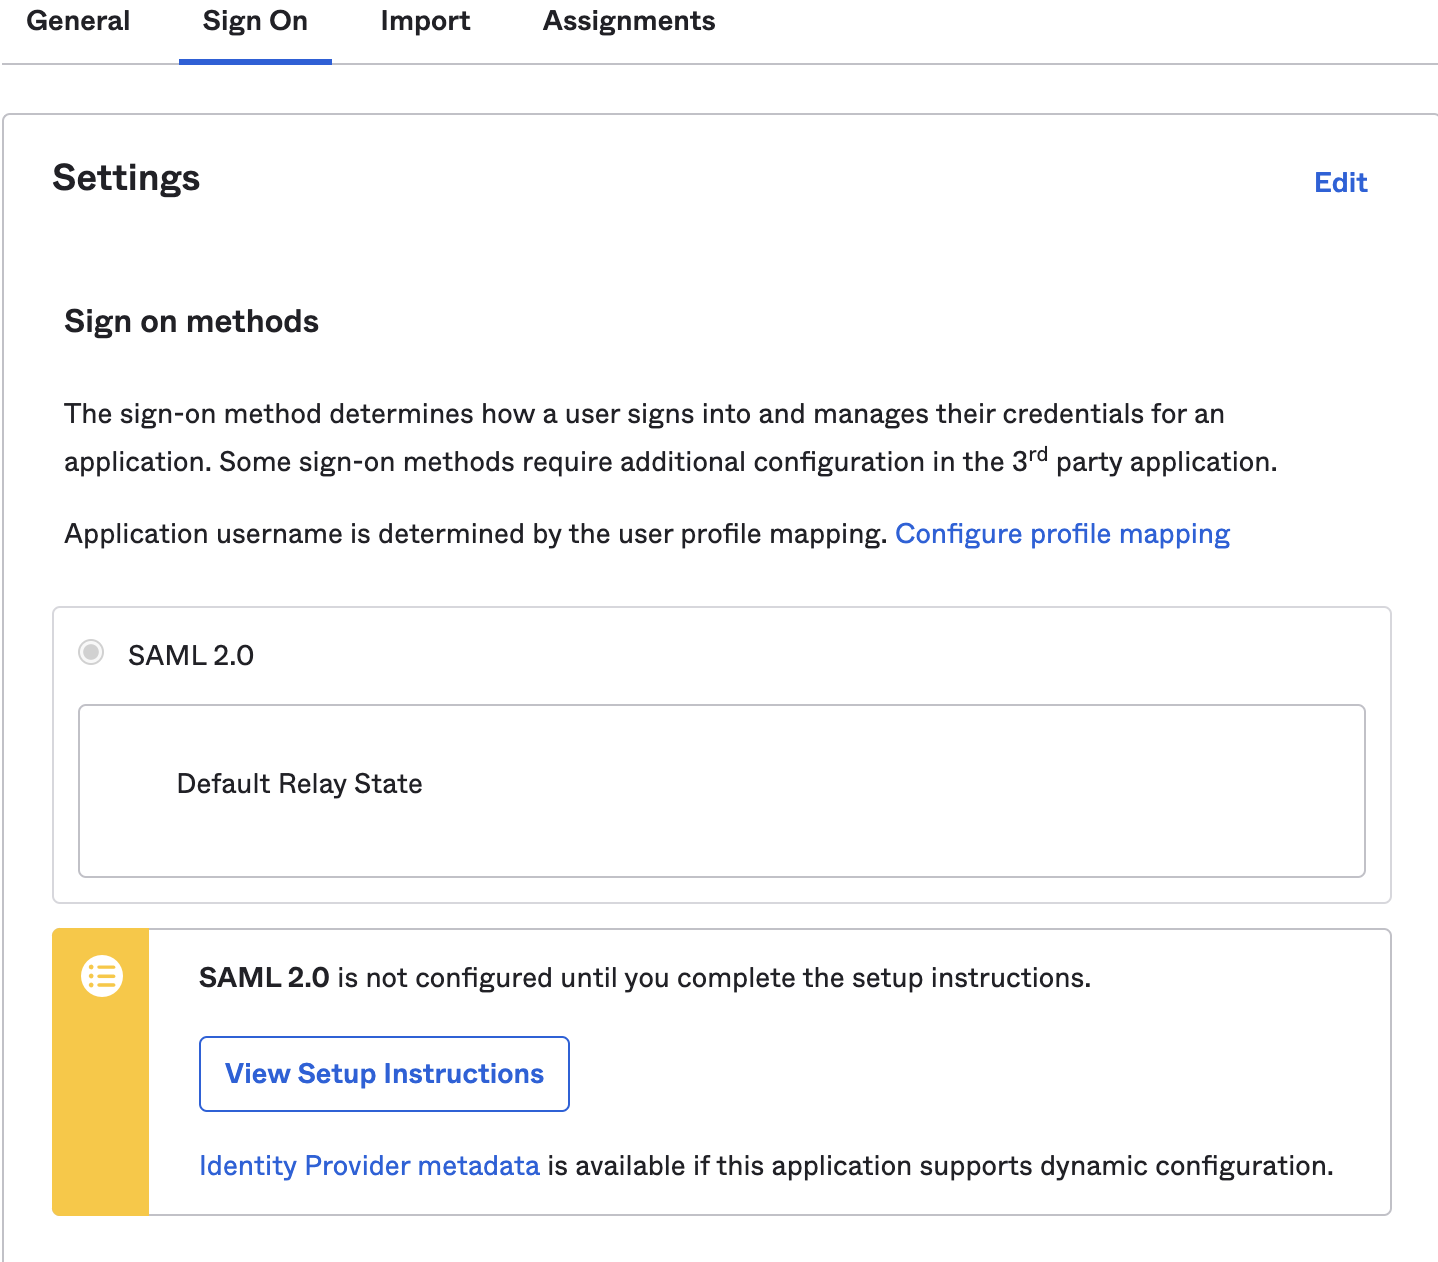
- To retrieve the SAML provider information, navigate to the Sign On and click View Setup Instructions. A new page will open showing the Identity Provider Single Sign-on URL, Identity Provider Issuer, and X.509 Certificate. Save this information for configuring your Zero Trust settings.
In Zero Trust, navigate to Settings > Authentication.
Click Add new under Login Methods, and select SAML.
Fill in the following information:
- Name: Name your identity provider.
- Single Sign On URL: Enter the Identity Provider Single-Sign-On URL from Okta.
- Issuer ID: Enter the Identity Provider Issuer from Okta, for example
http://www.okta.com/<your-okta-entity-id>. - Signing Certificate: Copy-paste the X.509 Certificate from Okta.
(Recommended) Enable Sign SAML authentication request.
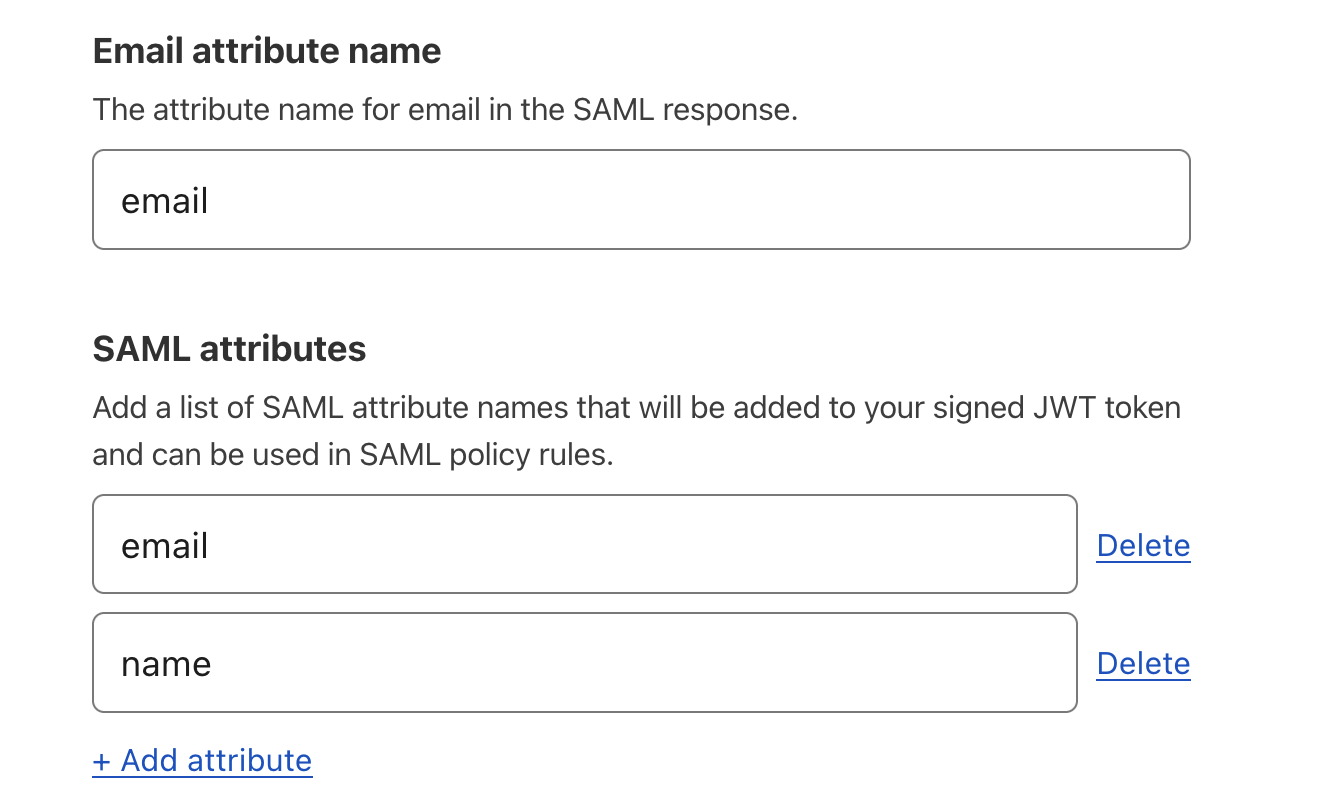
(Recommended) Under SAML attributes, enter
emailandname. Thenameattribute is required if you want to use Okta groups.
- Click Save.
To test that your connection is working, navigate to Settings > Authentication > Login methods and click Test next to Okta. A success response should return the configured SAML attributes.
Example API configuration
{    "config": {        "issuer_url": "http://www.okta.com/exkbhqj29iGxT7GwT0h7",        "sso_target_url": "https://dev-abc123.oktapreview.com/app/myapp/exkbhqj29iGxT7GwT0h7/sso/saml",        "attributes": [            "email",            "group",            "email_attribute_name": "",            "sign_request": false,            "idp_public_cert": "MIIDpDCCAoygAwIBAgIGAV2ka+55MA0GCSqGSIb3DQEBCwUAMIGSMQswCQYDVQQGEwJVUzETMBEG\nA1UEC.....GF/Q2/MHadws97cZg\nuTnQyuOqPuHbnN83d/2l1NSYKCbHt24o"        ]    },    "type": "saml",    "name": "okta saml example"
}