SAML | Keycloak
Keycloak is an open source identity and access management solution built by JBoss. Need a Keycloak lab environment for testing? An example is available here.
Set up Keycloak (SAML)
To set up Keycloak (SAML) as your identity provider:
In Keycloak, select Clients in the navigation bar and create a new client.
Under Client ID, enter your team domain followed by this callback at the end of the path:
/cdn-cgi/access/callback. For example:https://<your-team-name>.cloudflareaccess.com/cdn-cgi/access/callback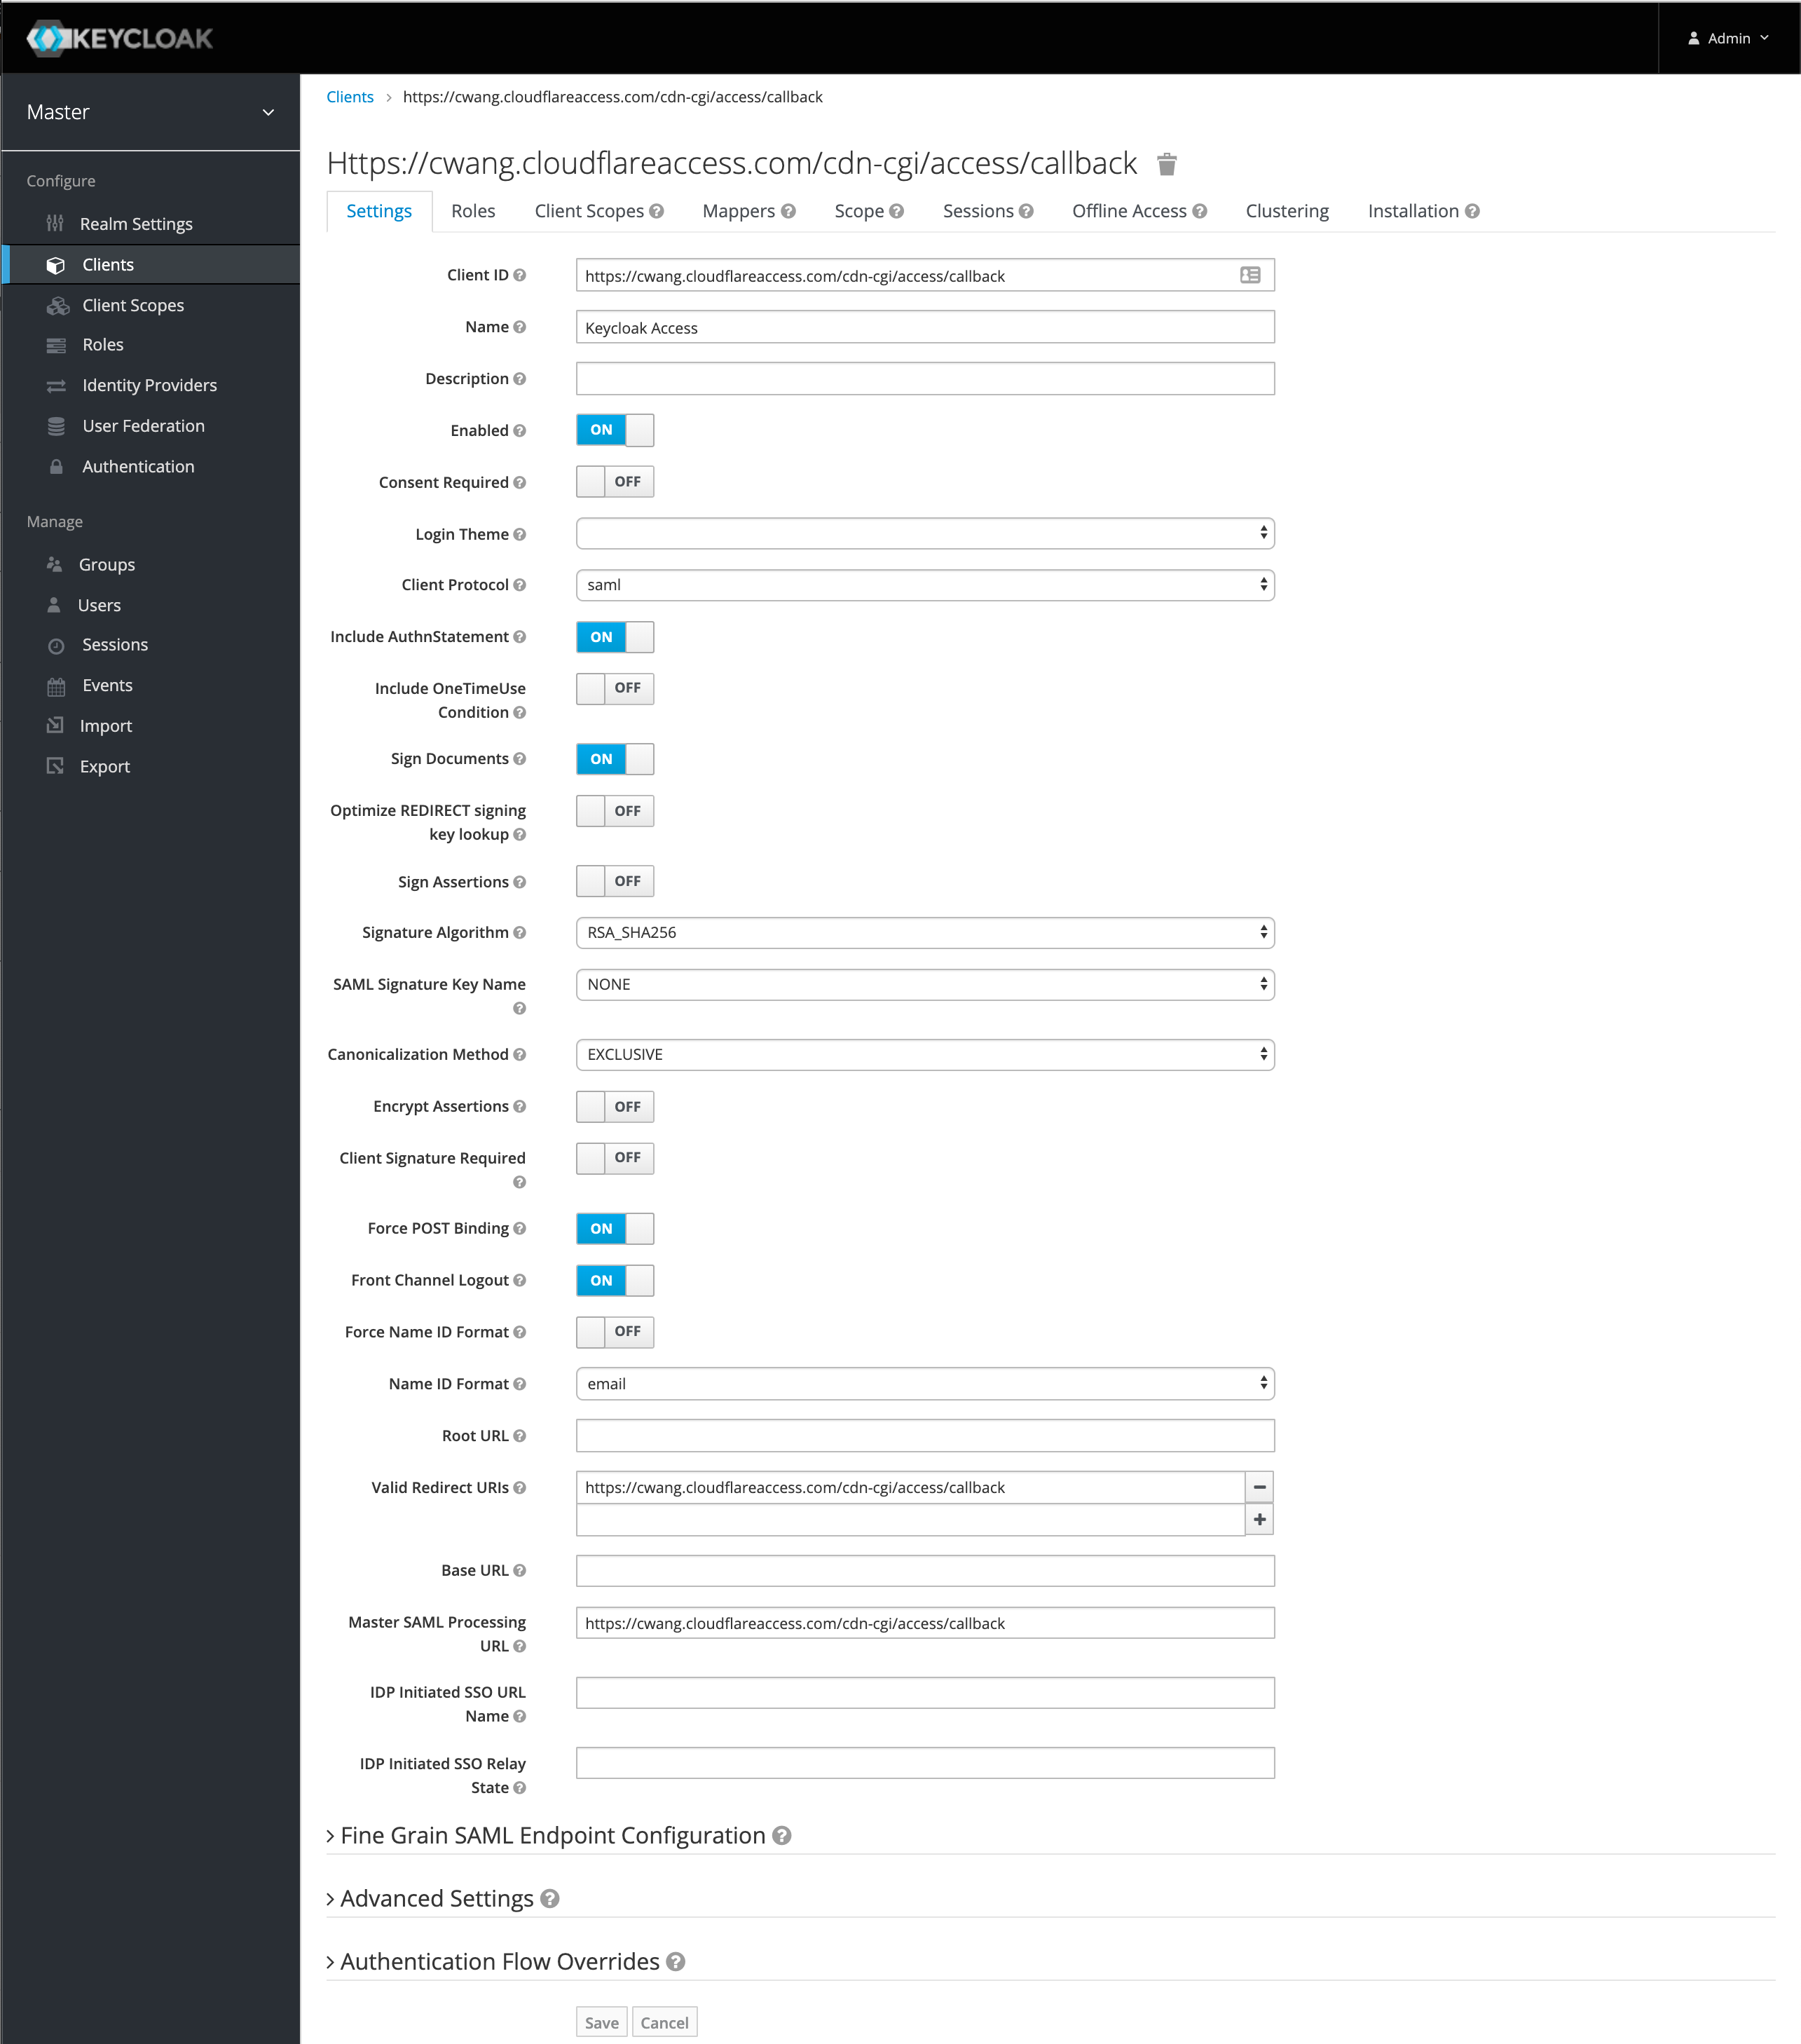
Change the
Name ID FormattoemailNext, set the valid redirect URI to the Keycloak domain that you are using. For example,
https://<your-team-name>.cloudflareaccess.com/cdn-cgi/access/callback.Set the Master SAML Processing URL using the same Keycloak domain:
https://<keycloak_domain>/auth/realms/master/protocol/saml.If you wish to enable client signatures, enable
Client Signature Requiredand click save.You will need to follow the steps here to get the certificate and enable it in the Cloudflare dashboard.
Import the Access certificate you downloaded into the
SAML Keystab. UseCertificate PEMas the format.
Set the built-in protocol mapper for the
emailproperty.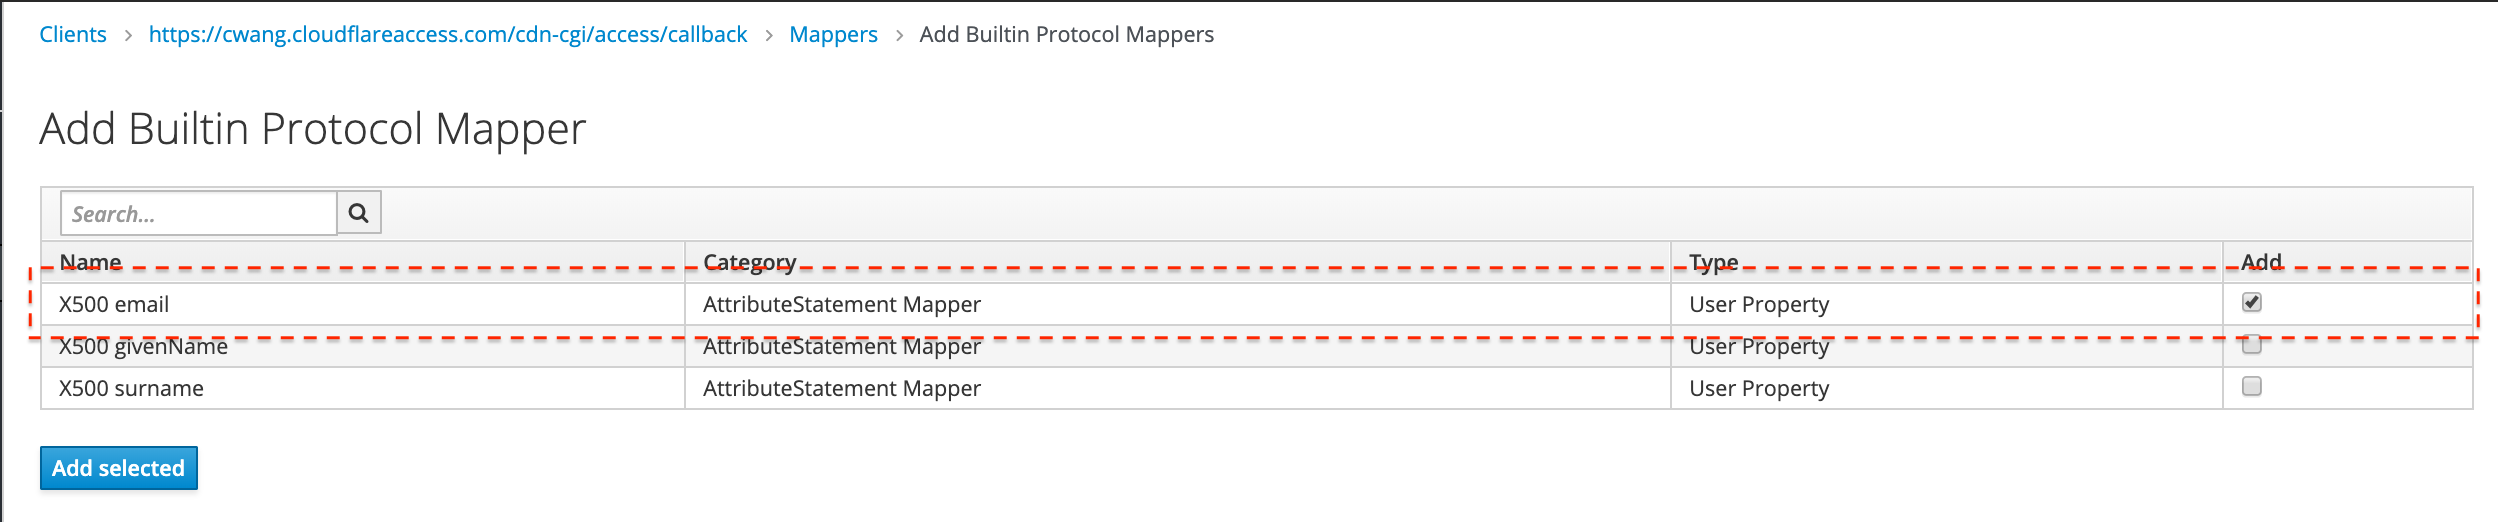
Next, you will need to integrate with Cloudflare Access.
In Zero Trust, navigate to Settings > Authentication.
Under Login methods, click Add new.
Choose SAML on the next page.
You will need to input the Keycloak details manually. The examples below should be replaced with the specific domains in use with Keycloak and Cloudflare Access.
Field Example Single Sign-On URL https://<keycloak_domain>/auth/realms/master/protocol/samlIdP Entity ID or Issuer URL https://<unique_id>.cloudflareaccess.com/cdn-cgi/access/callbackSigning certificate Use the X509 Certificate in the Realm Settings from Keycloak Click Save.
To test that your connection is working, navigate to Authentication > Login methods and click Test next to the login method you want to test.