Install the Cloudflare certificate
If your device does not support certificate installation via WARP, you can manually install the Cloudflare certificate. You will need to add the certificate to both the system keychain and to individual application stores. These steps will need to be performed on each new device that is to be subject to HTTP filtering.
Download the Cloudflare root certificate
First, download the Cloudflare certificate. The certificate is available both as a .pem and as a .crt file. Certain applications require the certificate to be in a specific file type, so ensure you download the most appropriate file for your use case.
Verify the certificate fingerprint
To verify your download, check that the certificate’s thumbprint matches:
SHA1
BB:2D:B6:3D:6B:DE:DA:06:4E:CA:CB:40:F6:F2:61:40:B7:10:F0:6C➜ ~ openssl x509 -noout -fingerprint -sha1 -inform der -in <Cloudflare_CA.crt>
SHA1 Fingerprint=BB:2D:B6:3D:6B:DE:DA:06:4E:CA:CB:40:F6:F2:61:40:B7:10:F0:6C
➜ ~ openssl x509 -noout -fingerprint -sha1 -inform pem -in <Cloudflare_CA.pem>
SHA1 Fingerprint=BB:2D:B6:3D:6B:DE:DA:06:4E:CA:CB:40:F6:F2:61:40:B7:10:F0:6C
SHA256
F5:E1:56:C4:89:78:77:AD:79:3A:1E:83:FA:77:83:F1:9C:B0:C6:1B:58:2C:2F:50:11:B3:37:72:7C:62:3D:EF➜ ~ openssl x509 -noout -fingerprint -sha256 -inform der -in <Cloudflare_CA.crt>
sha256 Fingerprint=F5:E1:56:C4:89:78:77:AD:79:3A:1E:83:FA:77:83:F1:9C:B0:C6:1B:58:2C:2F:50:11:B3:37:72:7C:62:3D:EF
➜ ~ openssl x509 -noout -fingerprint -sha256 -inform pem -in <Cloudflare_CA.pem>
sha256 Fingerprint=F5:E1:56:C4:89:78:77:AD:79:3A:1E:83:FA:77:83:F1:9C:B0:C6:1B:58:2C:2F:50:11:B3:37:72:7C:62:3D:EF
Add the certificate to your system
macOS
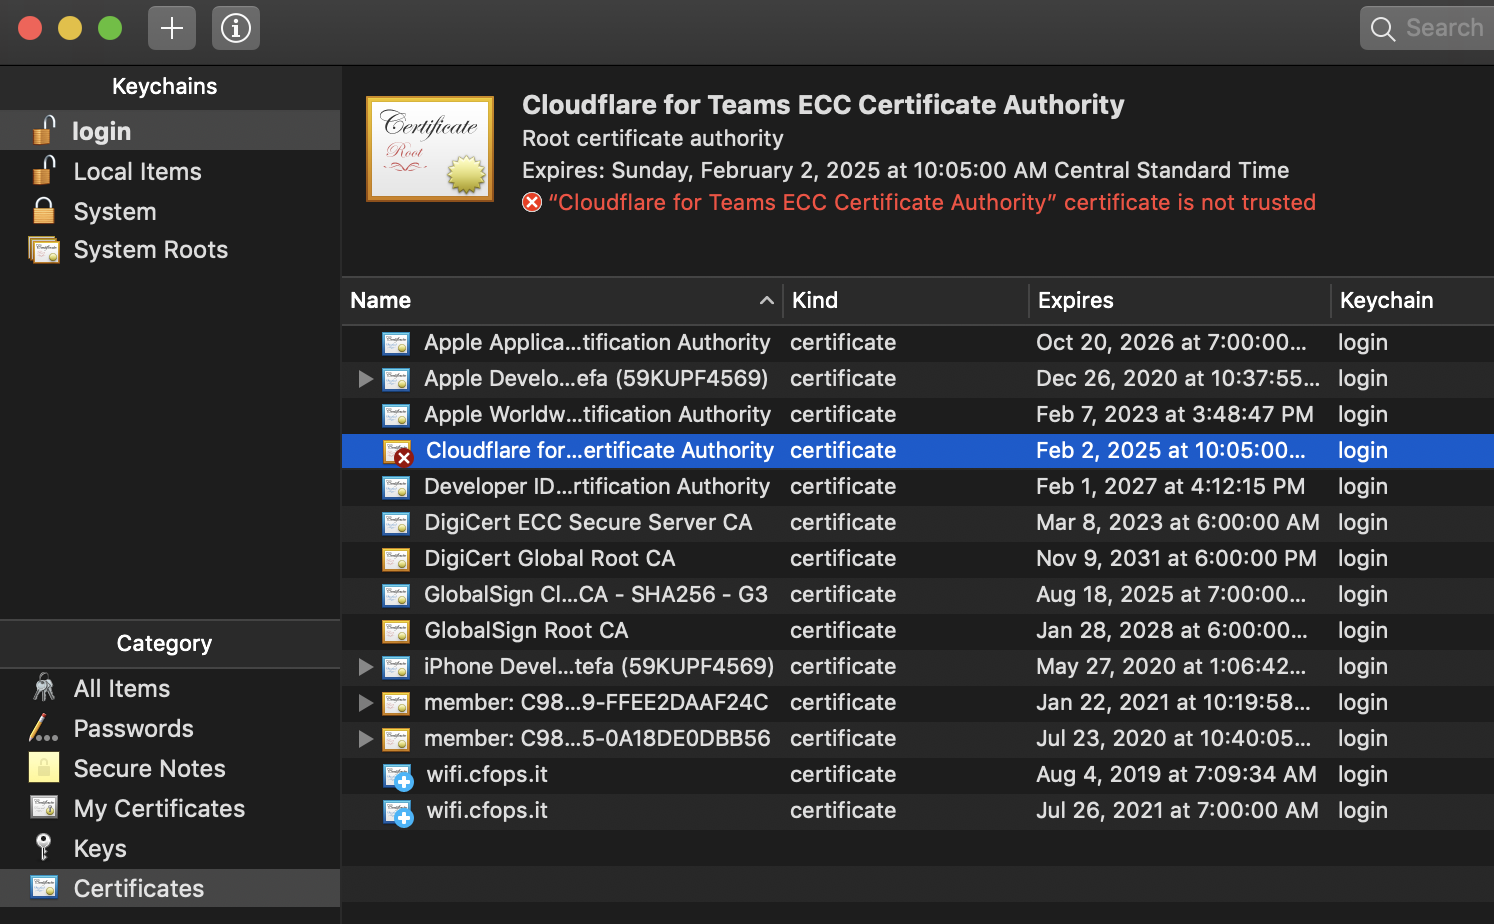
You will need to install the root certificate in the Keychain Access application. In the application, you can choose the keychain in which you want to install the certificate. macOS offers three options, each having a different impact on which users will be affected by trusting the root certificate.
| Keychain | Impact |
|---|---|
| login | The logged in user |
| Local Items | Cached iCloud passwords |
| System | All users on the system |
Installing the certificate in the Login keychain will result in only the logged in user trusting the Cloudflare certificate. Installing it in the System Keychain affects all users who have access to that machine.
To install the certificate in Keychain Access:
Double-click the
.crtfile.In the pop-up message, choose the option that suits your needs (login, Local Items, or System) and click Add.
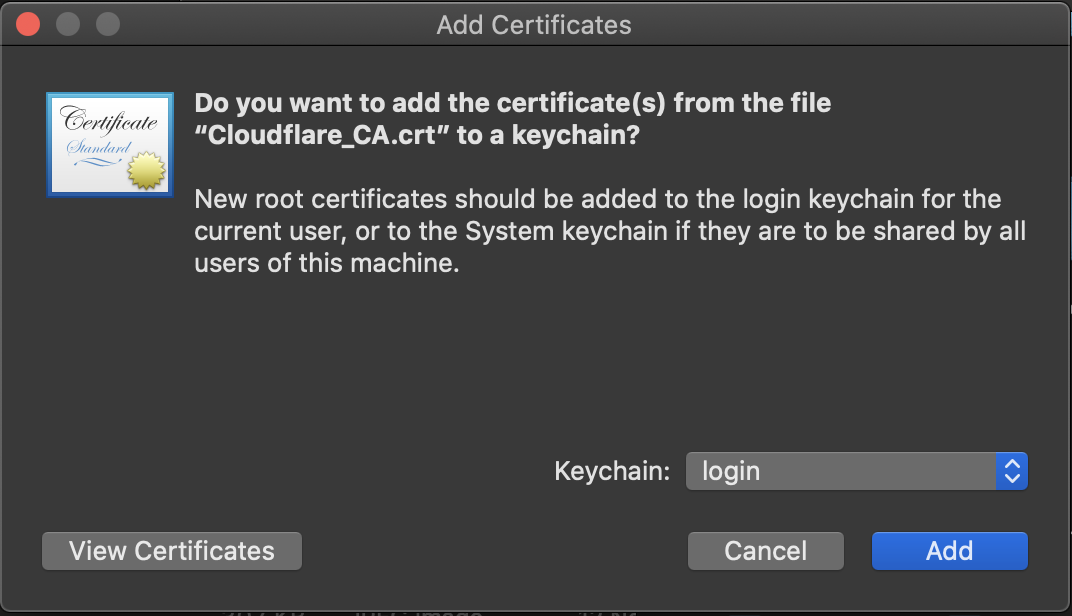
The certificate is now listed in your preferred keychain within the Keychain Access application. You can always move the certificate under a different keychain by dragging and dropping the certificate onto the desired keychain on the left.
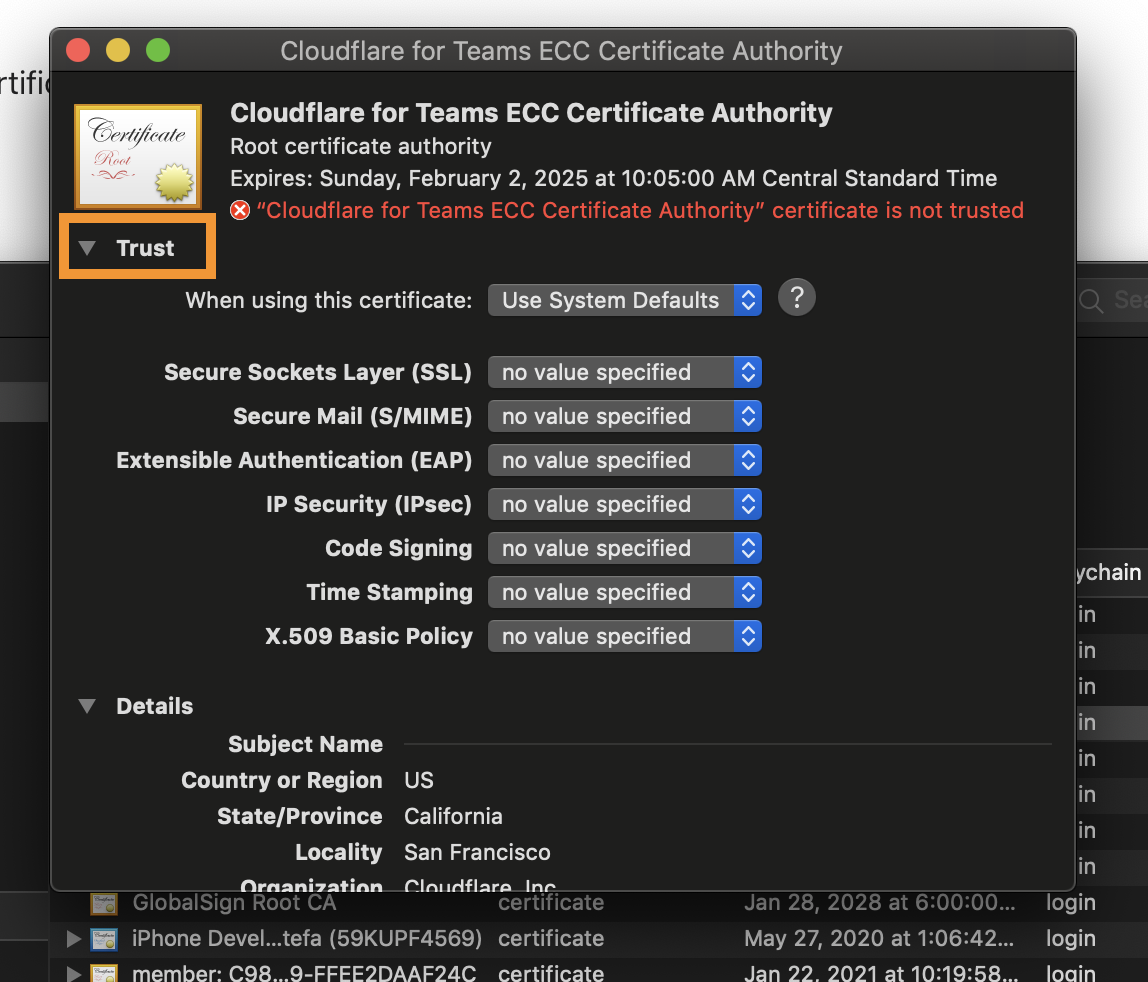
Double-click the certificate.
Click Trust.
- From the When using this certificate drop-down menu, select Always Trust.
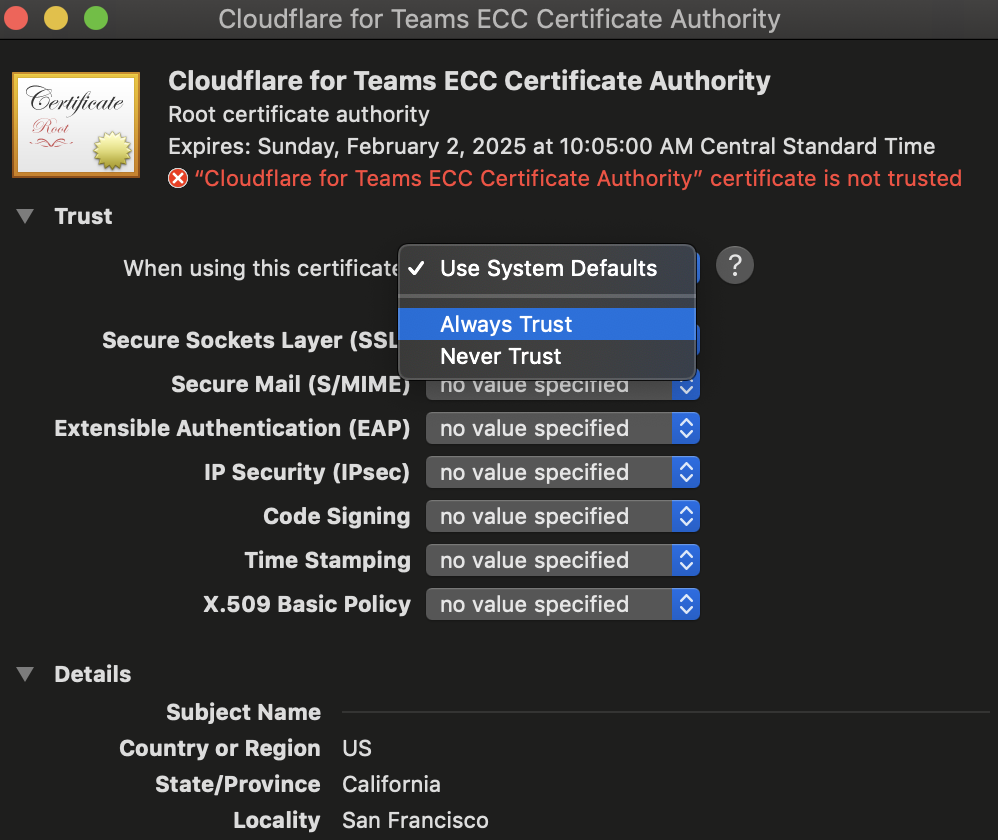
- Close the menu.
The root certificate is now installed and ready to be used.
Base Operating System
You can install the Cloudflare certificate on your terminal, too.
- Download the Cloudflare certificate.
- Open Terminal.
- Launch the following command:
$ sudo security add-trusted-cert -d -r trustRoot -k /Library/Keychains/System.keychain <Cloudflare_CA.crt>
- Update the OpenSSL CA Store to include the Cloudflare certificate:
$ echo | sudo cat - Cloudflare_CA.pem >> /usr/local/etc/openssl/cert.pem
iOS
iOS only allows the Safari browser to open and install certificates.
- Open Safari and download the Cloudflare certificate. The device will show a message: This website is trying to download a configuration profile. Do you want to allow this?
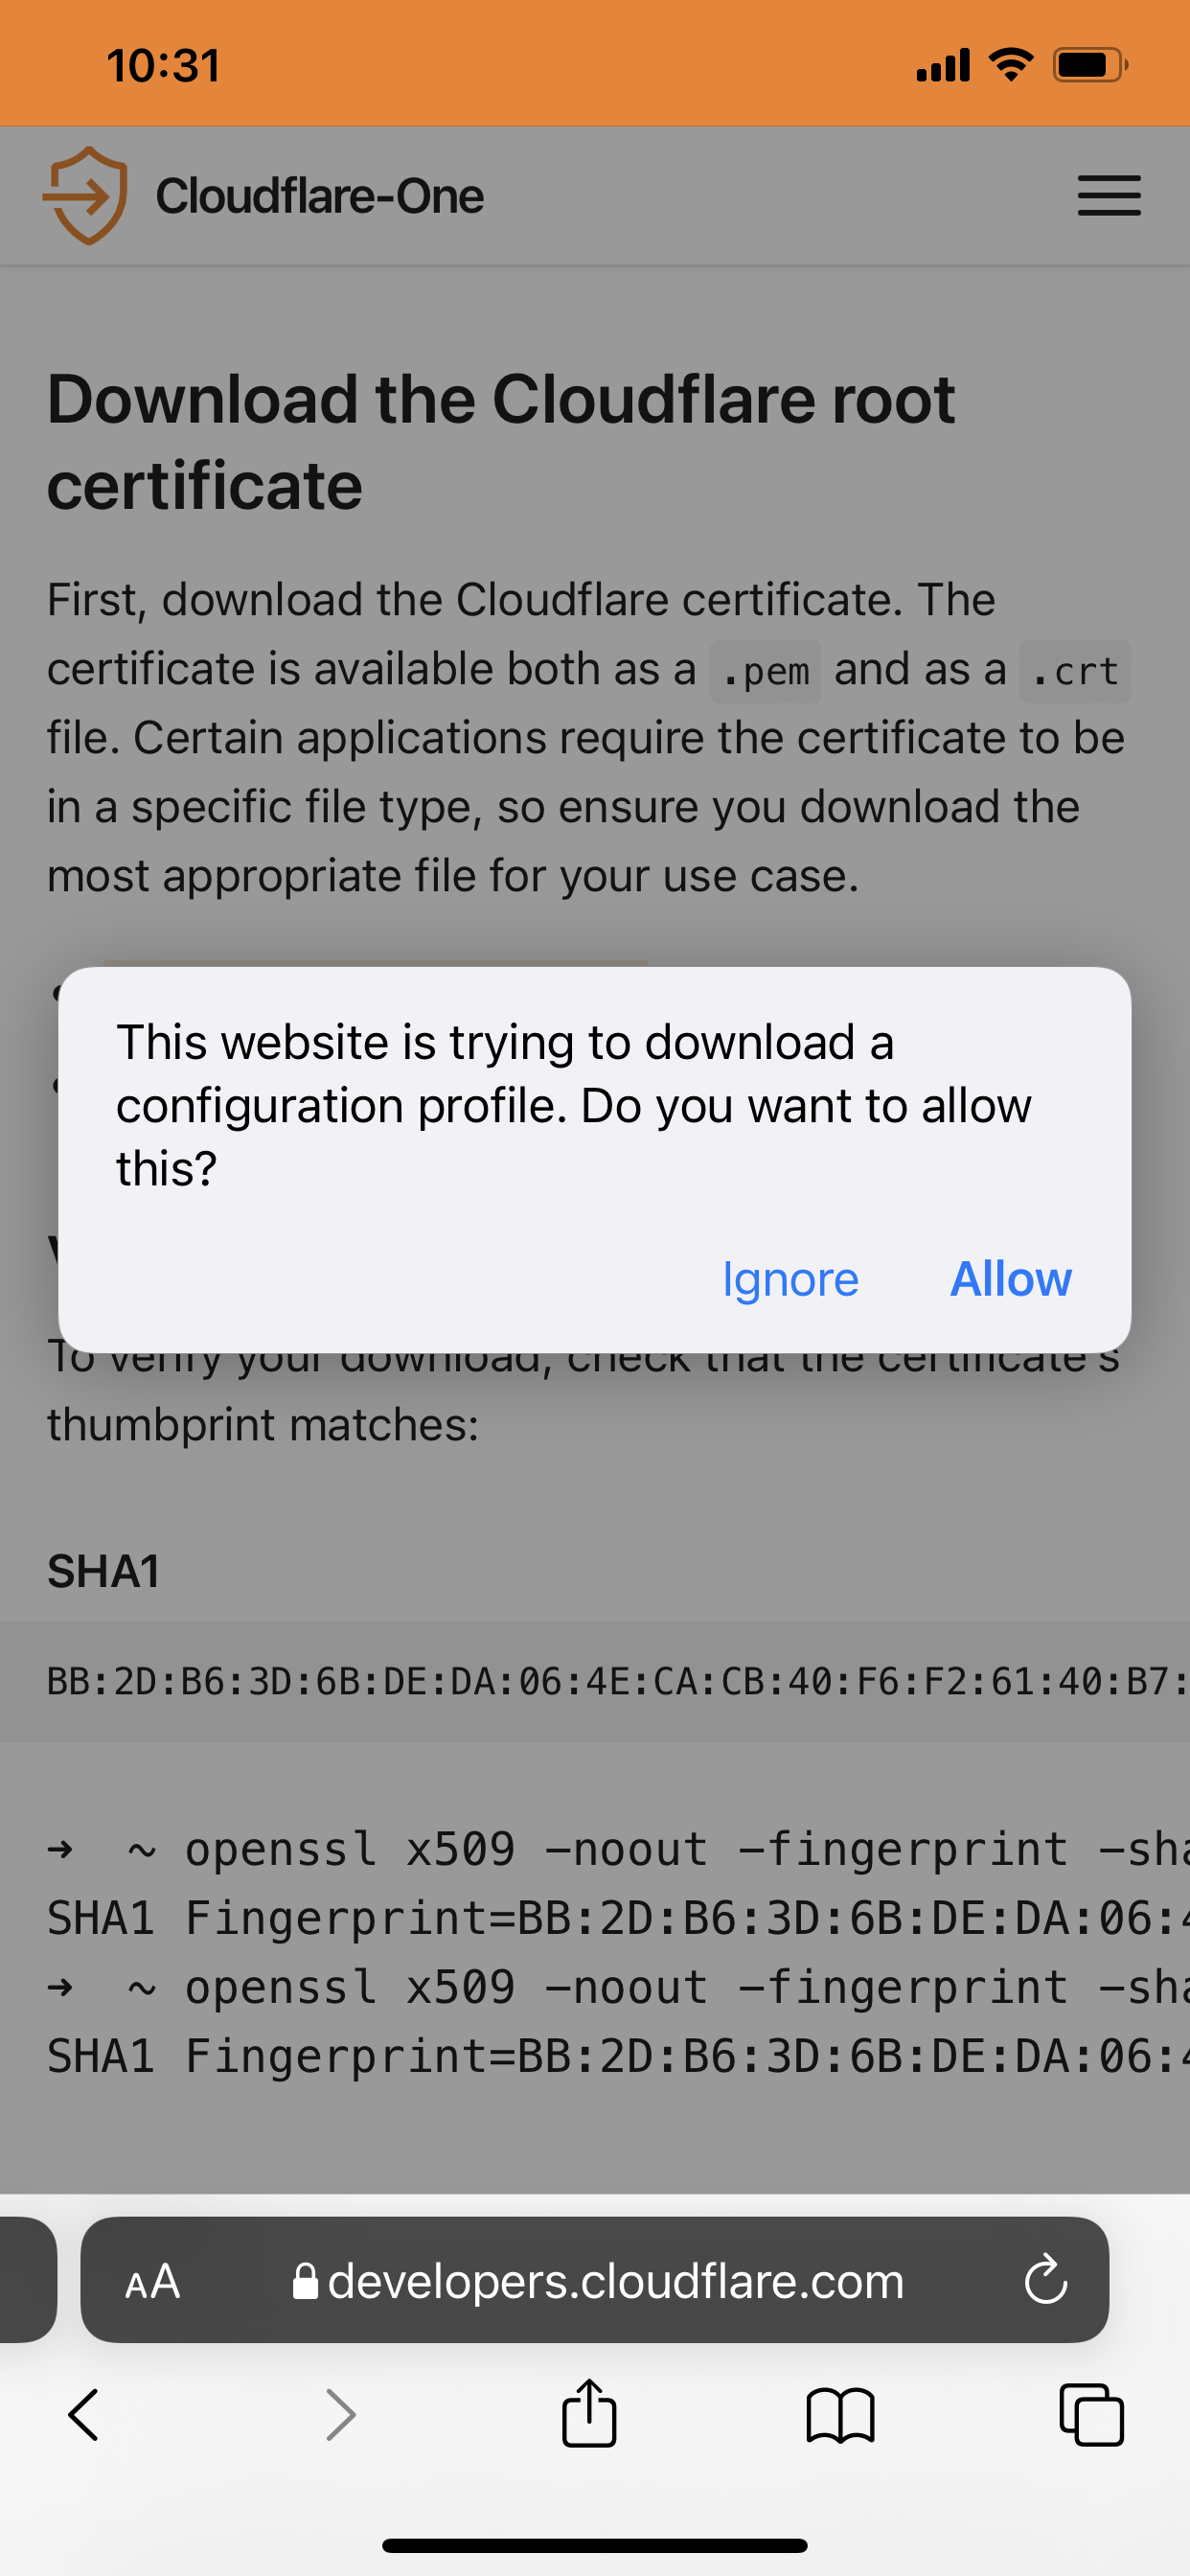
Tap Allow.
Navigate to Settings > General > VPN & Device Management and find the Cloudflare for Teams ECC Certificate Authority profile.
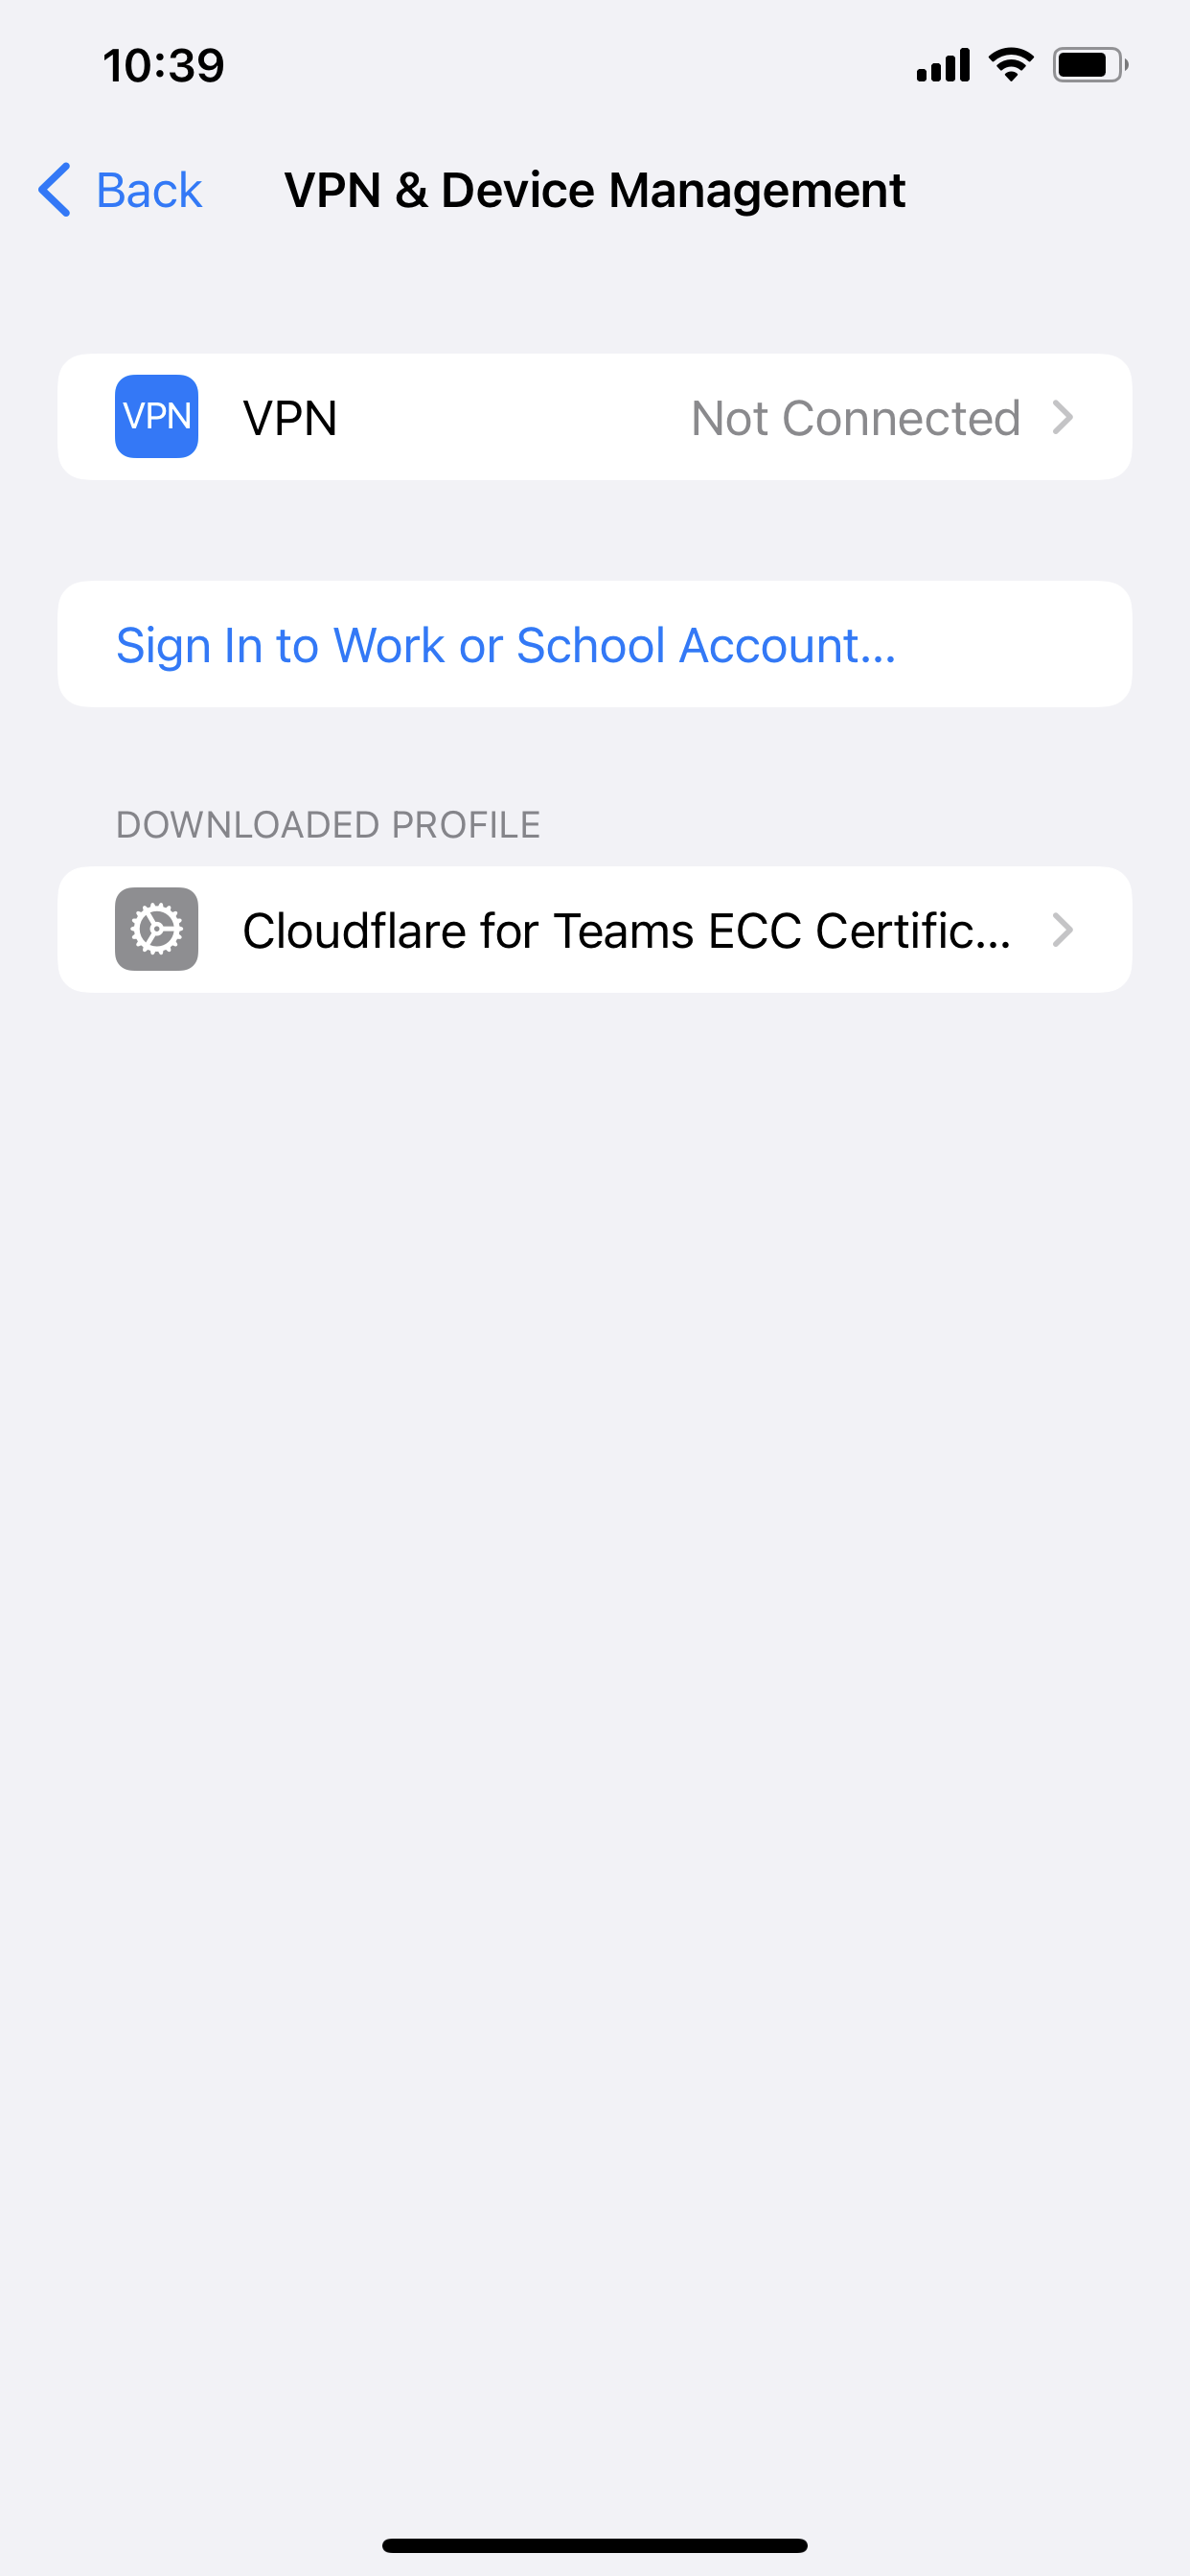
Select the profile and tap Install. If the iOS device is passcode-protected, you will be prompted to enter the passcode.
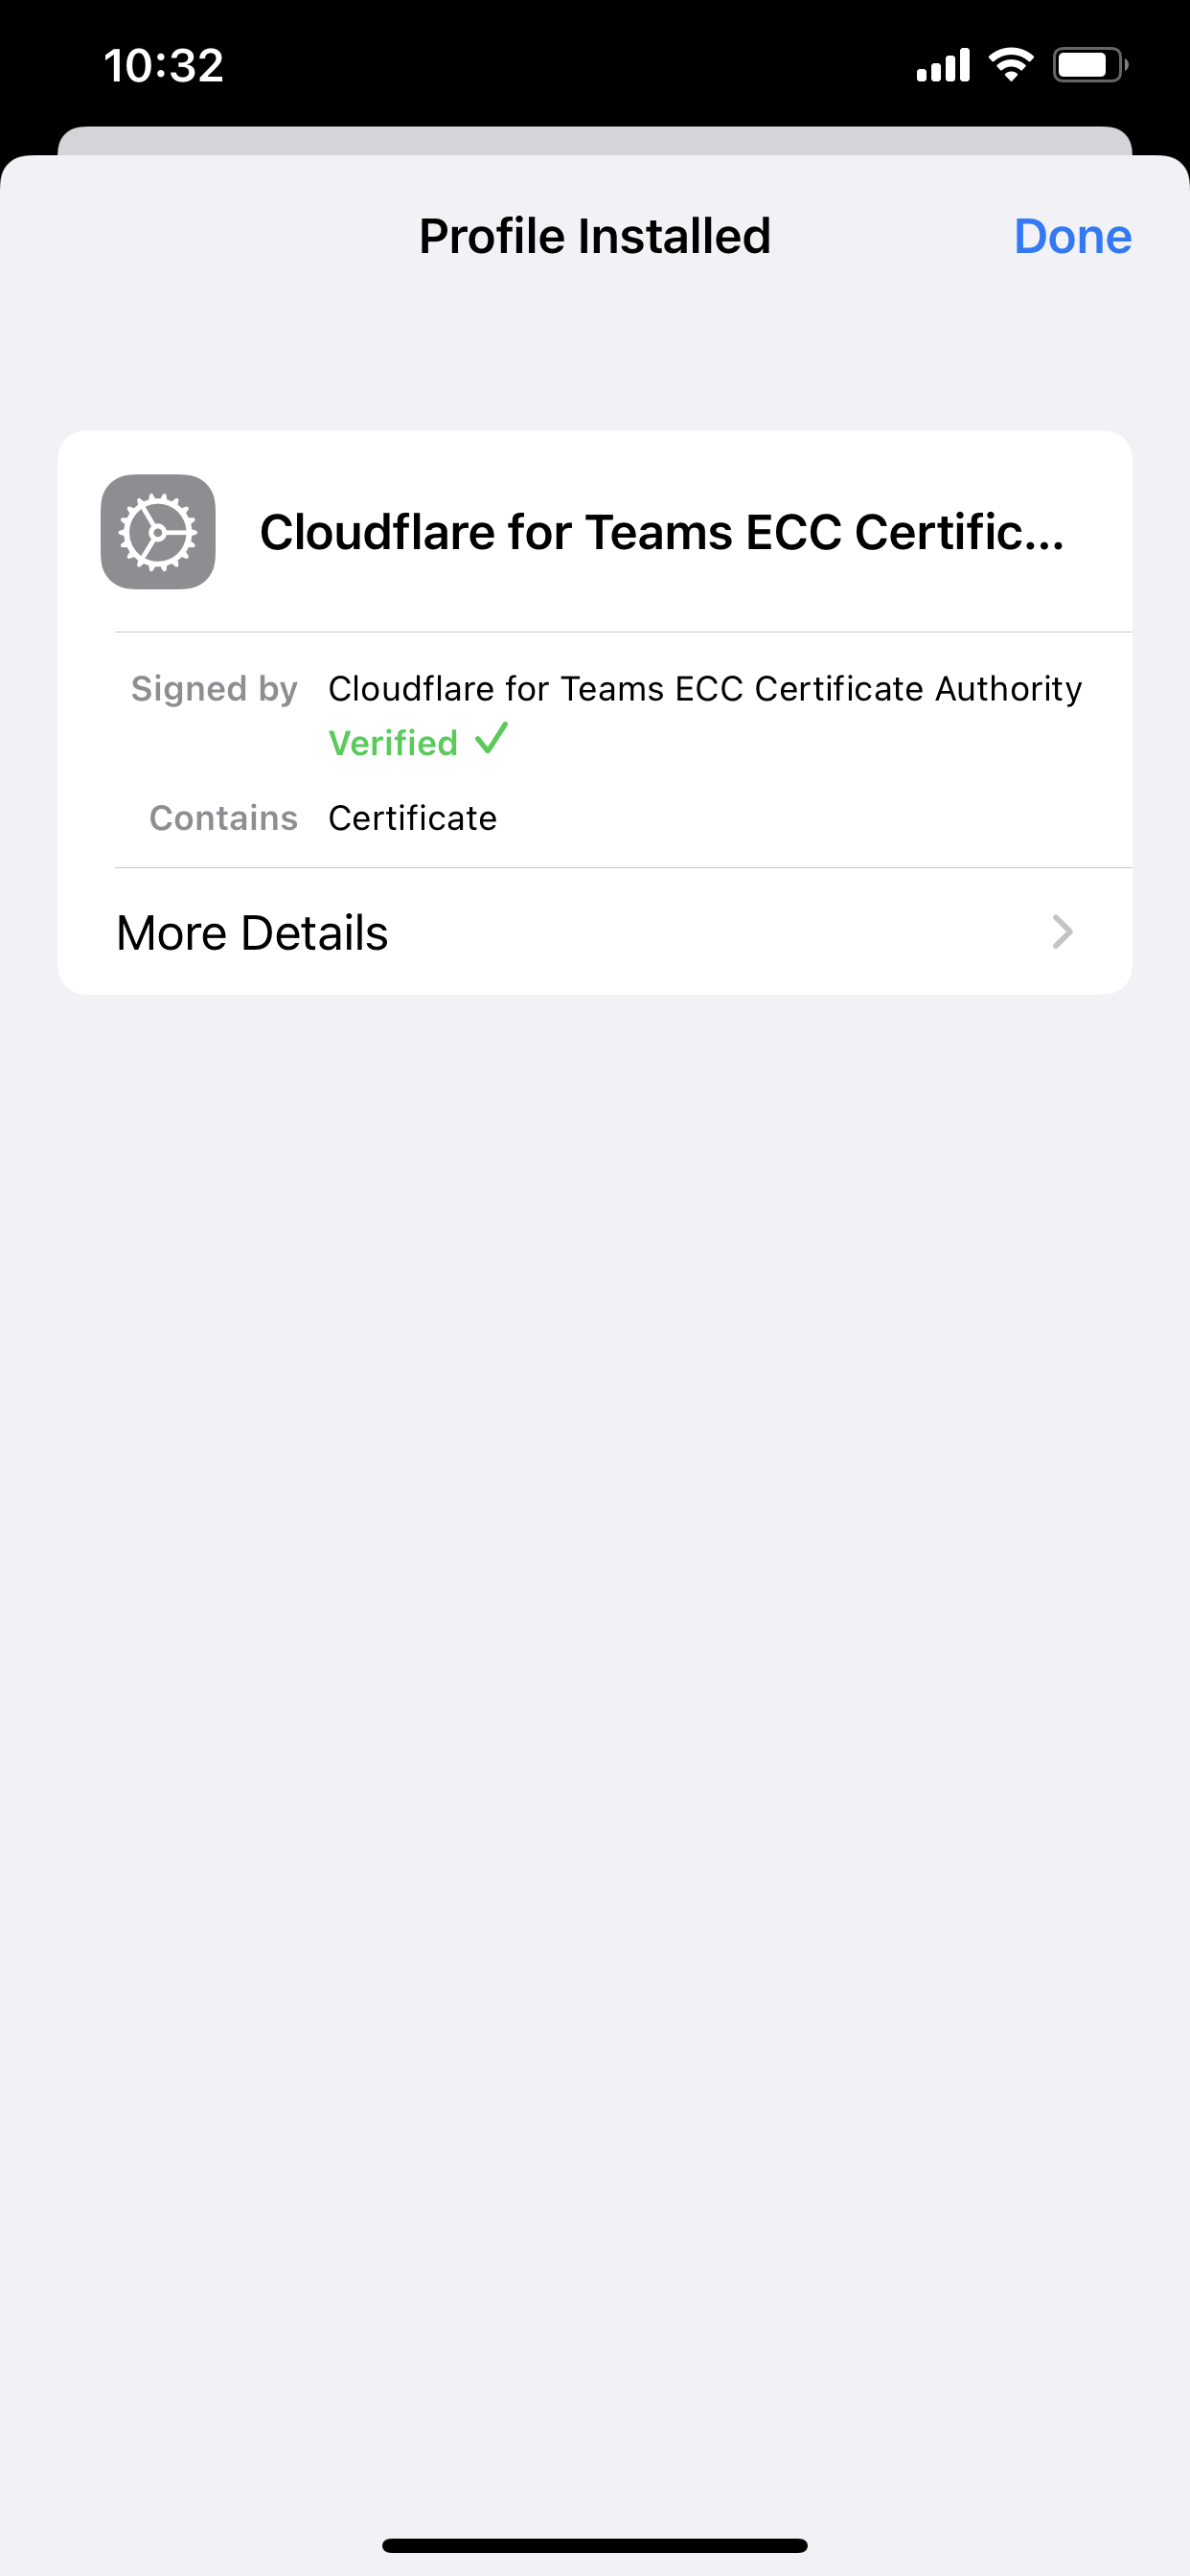
Next, a certificate warning will appear. Tap Install.
If a second prompt is displayed, tap Install again.
- Next, the Profile Installed screen will appear. Tap Done.
The certificate is now installed. However, before it can be used, it must be trusted by the device.
- On the device, go to Settings > General > About > Certificate Trust Settings.
The installed root certificates will be displayed in the Enable full trust for root certificates section.
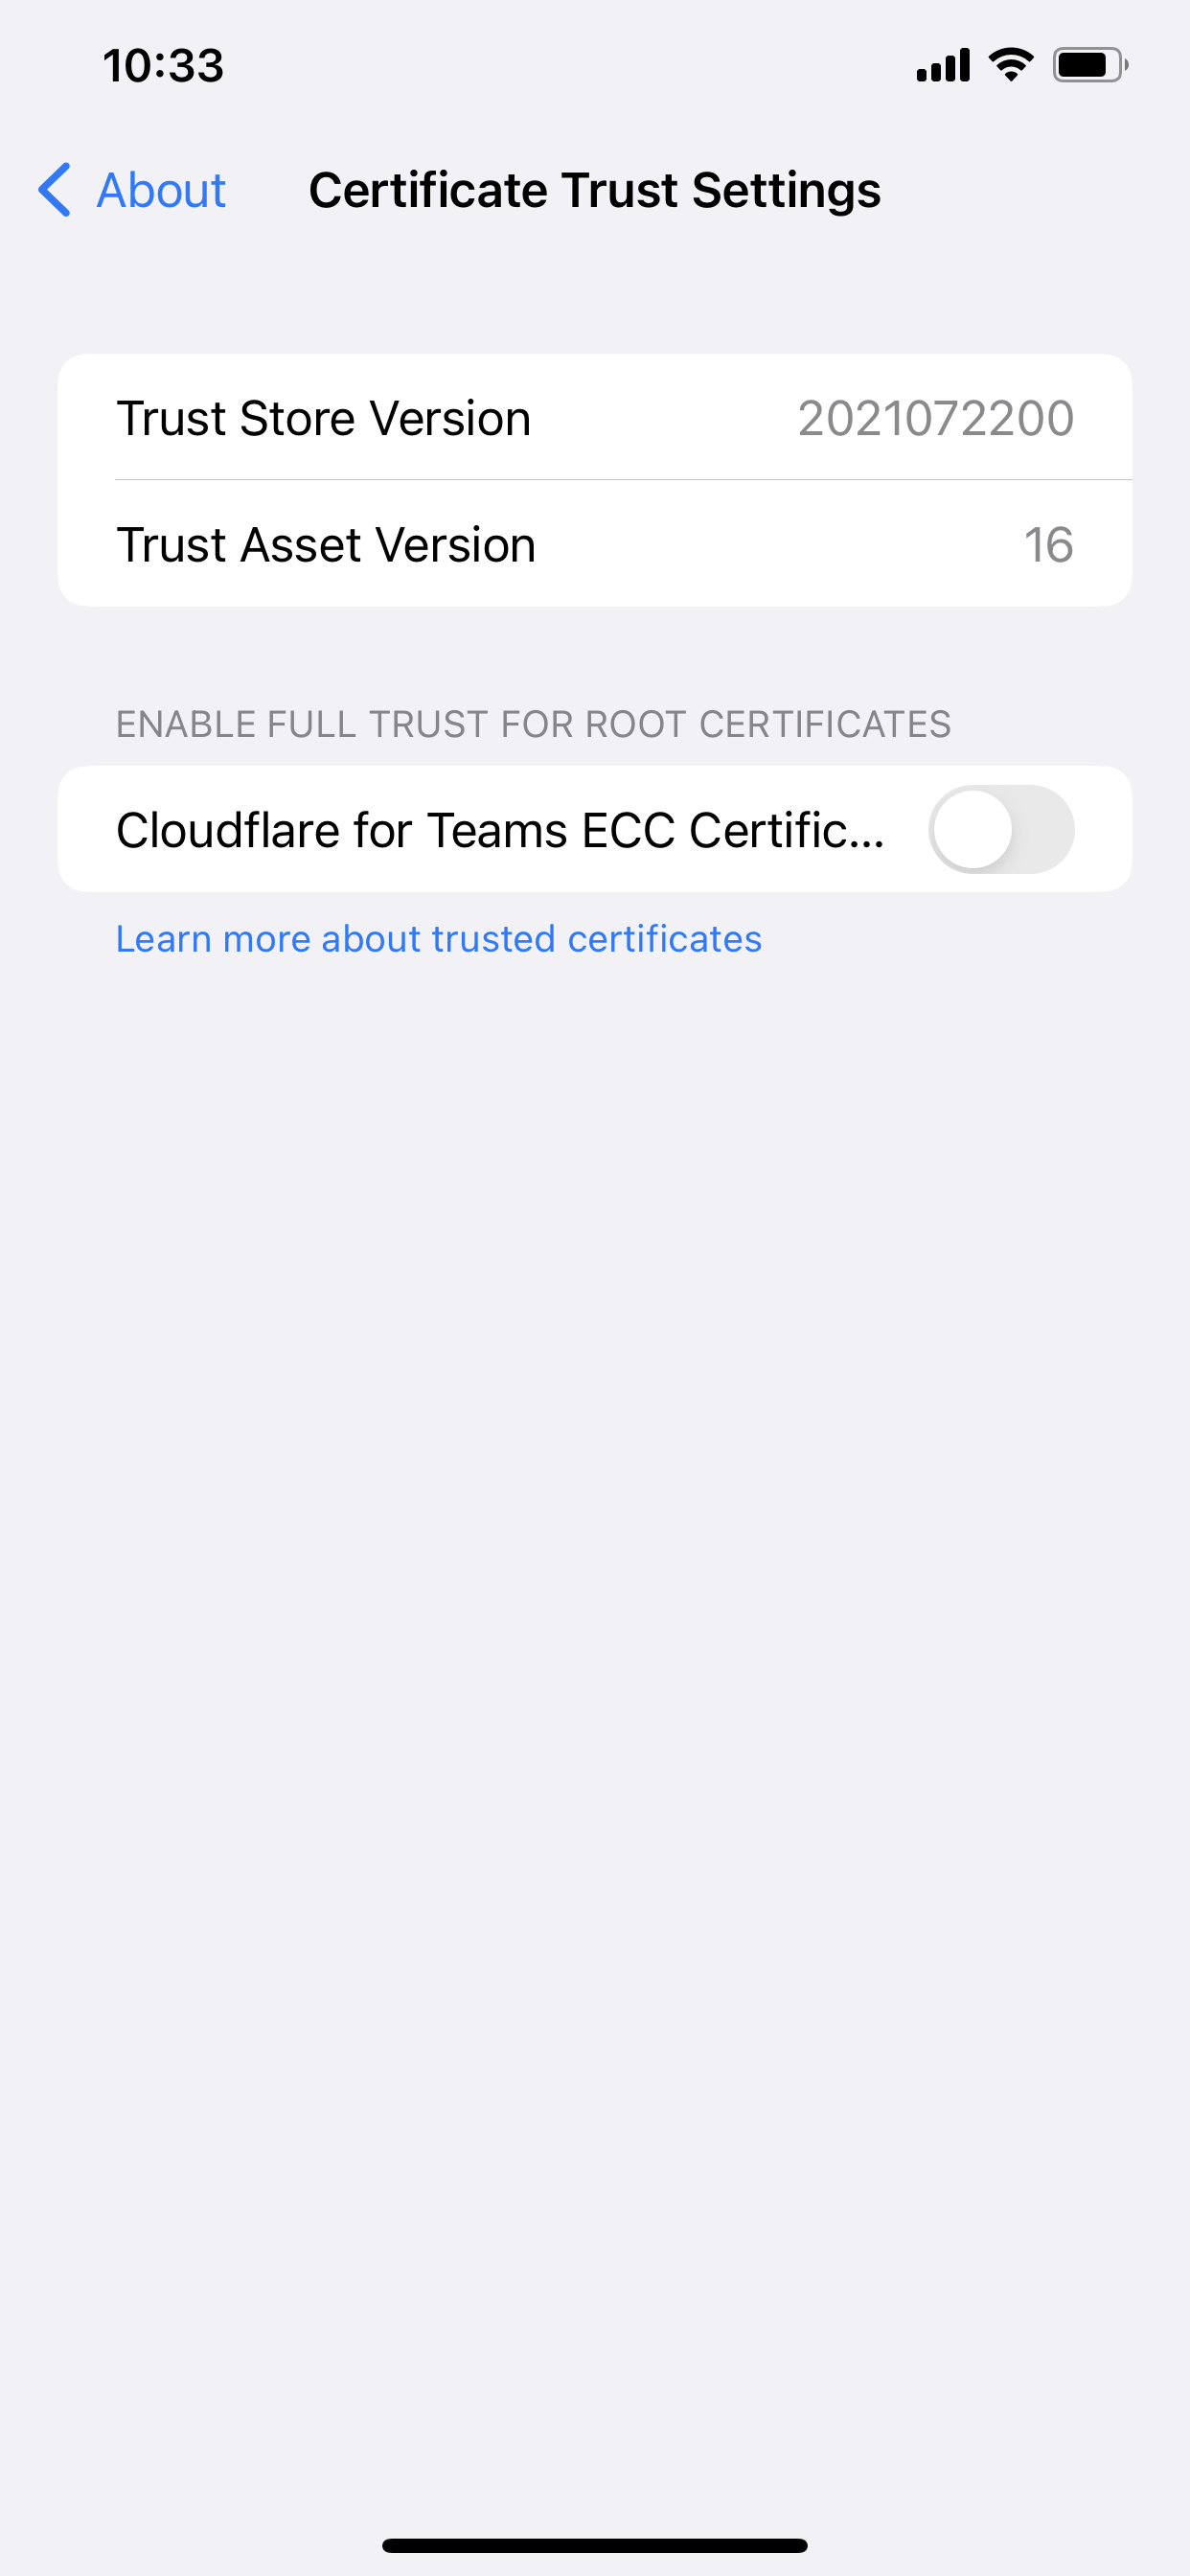
Tap the slide button next to the Cloudflare certificate you just installed.
A confirmation dialogue will appear. Tap Continue.
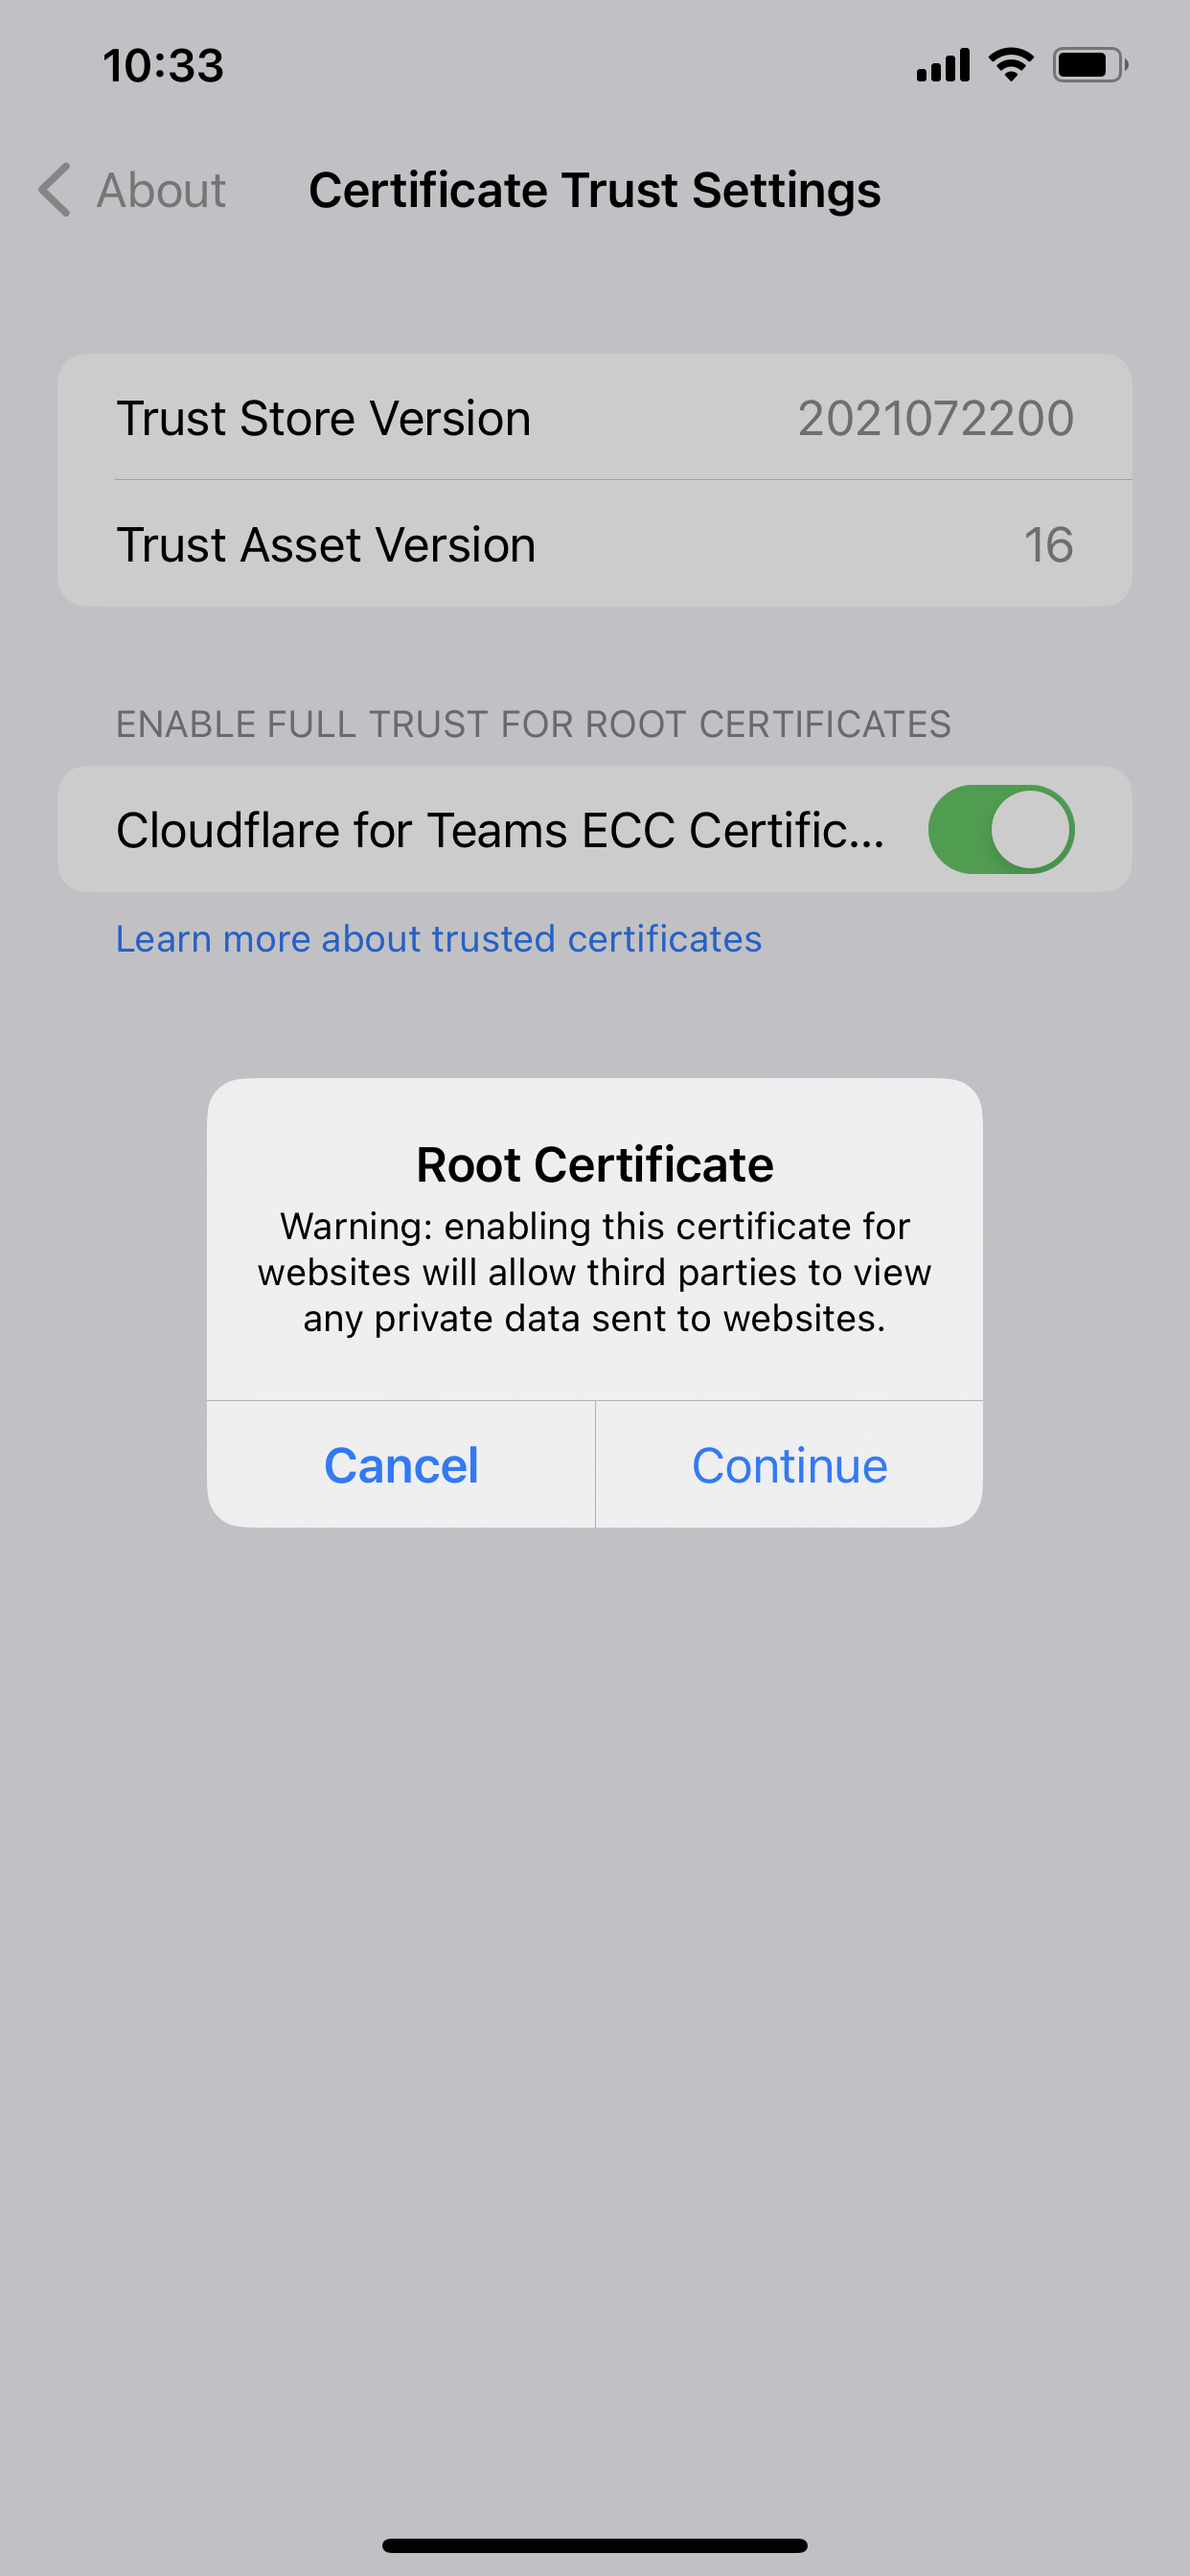
The root certificate is now installed and ready to be used.
Windows
Windows offers two options to install the certificate, each having a different impact on which users will be affected by trusting the root certificate.
| Store Location | Impact |
|---|---|
| Current User Store | The logged in user |
| Local Machine Store | All users on the system |
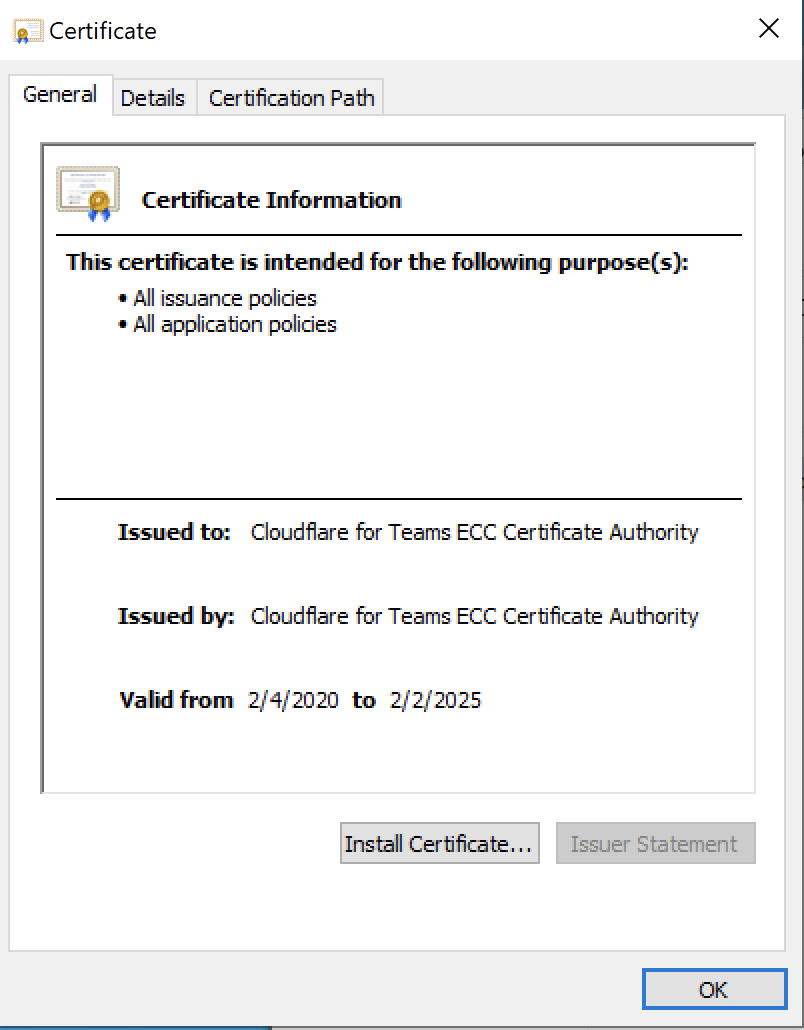
Right-click the certificate file.
Click Open. If you see a Security Warning, click Open to proceed.
The Certificate window will appear. Click Install Certificate.
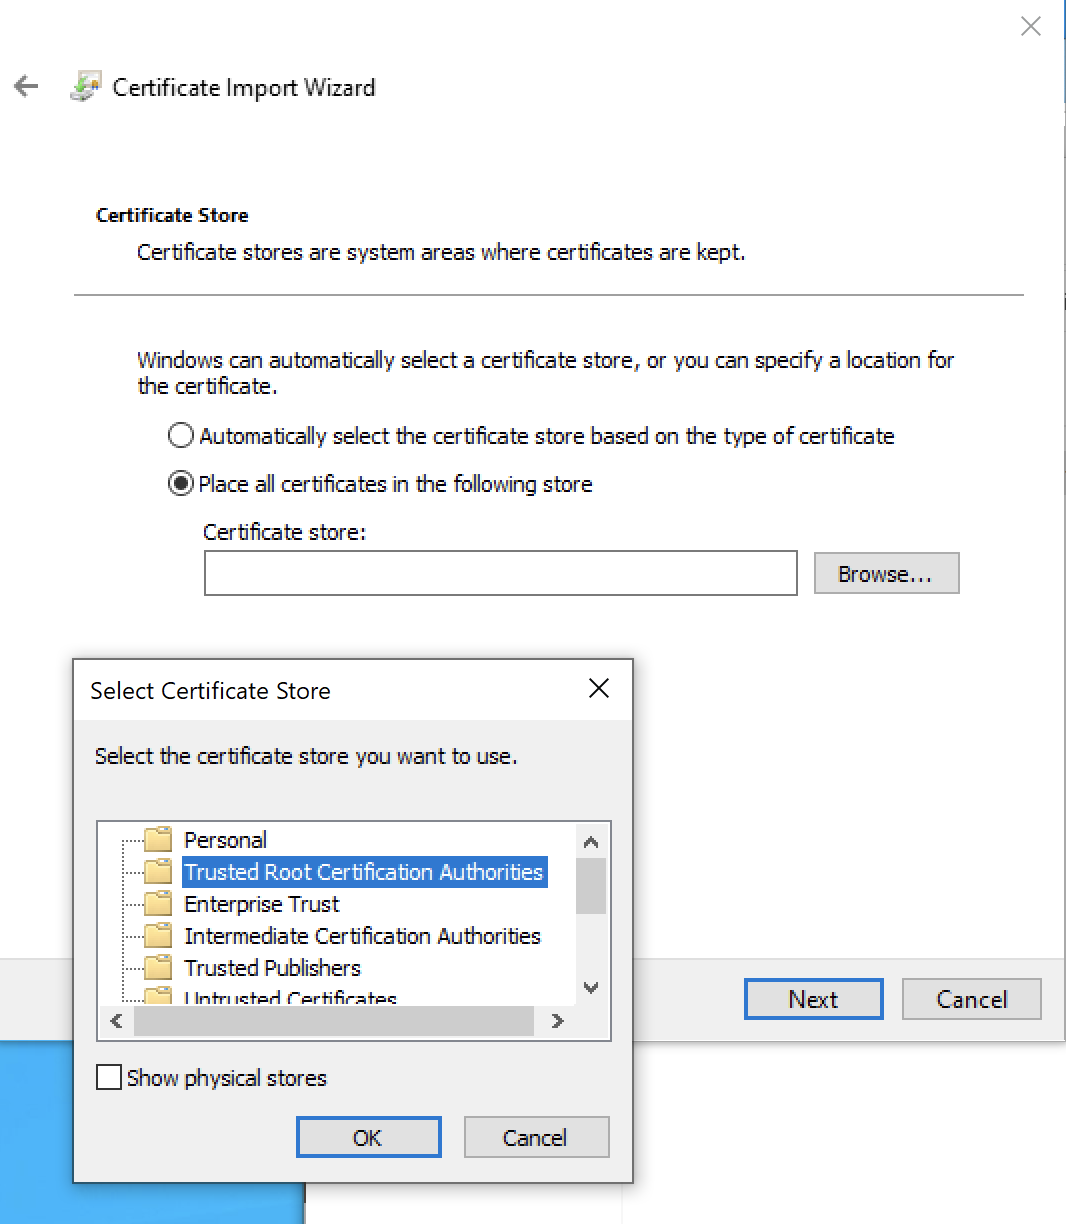
Now choose a Store Location. If you see a Security Warning, click Yes to proceed.
On the next screen, click Browse.
Choose the Trusted Root Certification Authorities store.
Click OK.
- Click Finish.
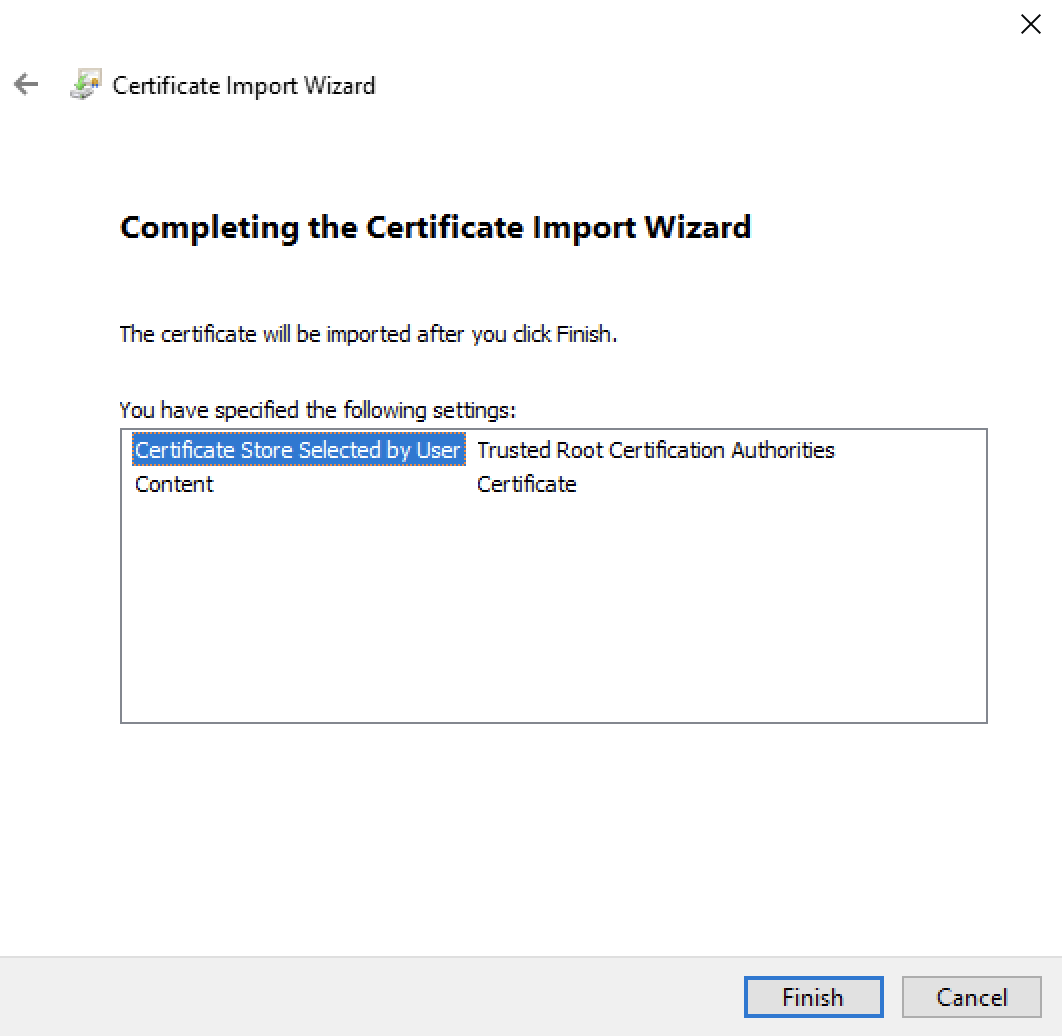
The root certificate is now installed and ready to be used.
Linux
The location where the root certificate should be installed is different depending on your Linux distribution. Please follow the specific instructions for your flavor of Linux.
Debian / Ubuntu
- Download the .pem certificate.
- Copy the certificate to the system, changing the file extension to
.crt.
$ sudo cp Cloudflare_CA.pem /usr/local/share/ca-certificates/Cloudflare_CA.crt
- Import the certificate.
$ sudo dpkg-reconfigure ca-certificates
CentOS / RedHat
- Download both the .crt certificate and the .pem certificate.
- Copy both certificates to the trust store.
$ sudo cp Cloudflare_CA.crt Cloudflare_CA.pem /etc/pki/ca-trust/source/anchors
- Import the certificate.
$ sudo update-ca-trust
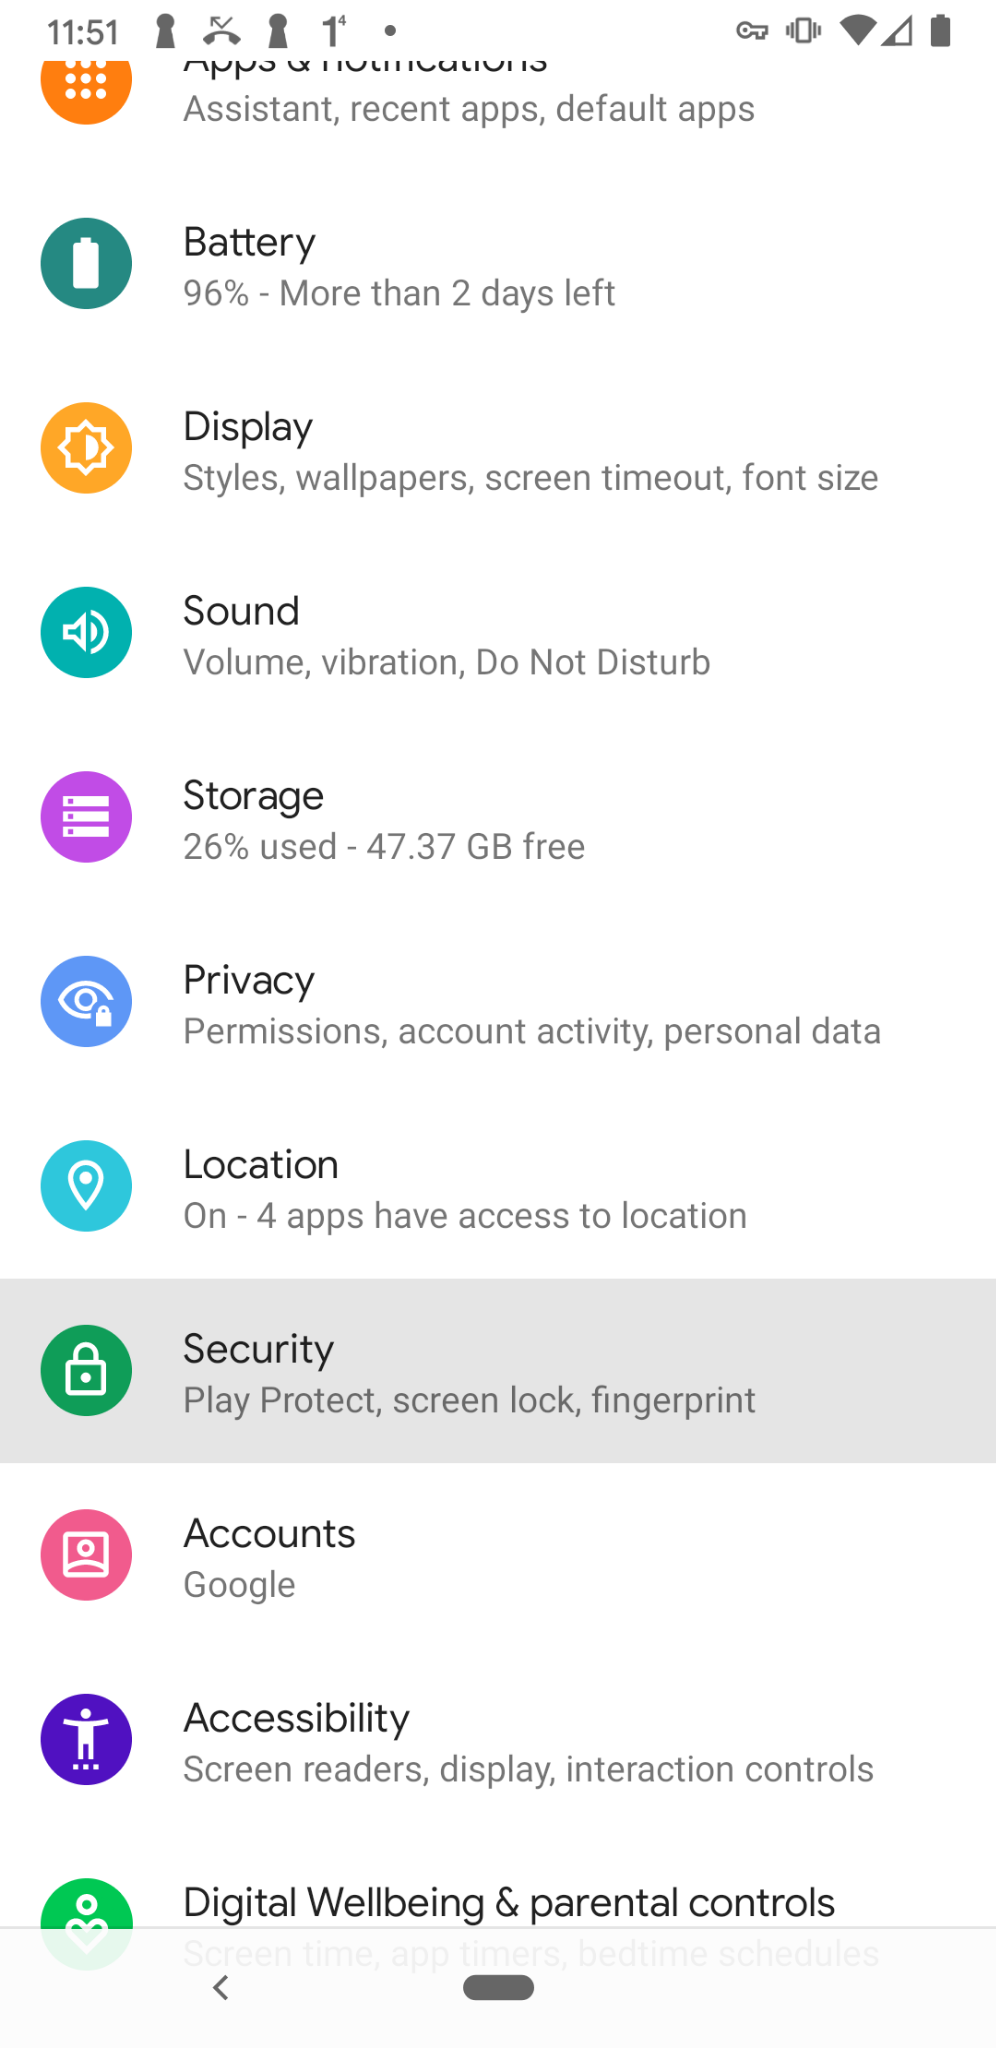
Android
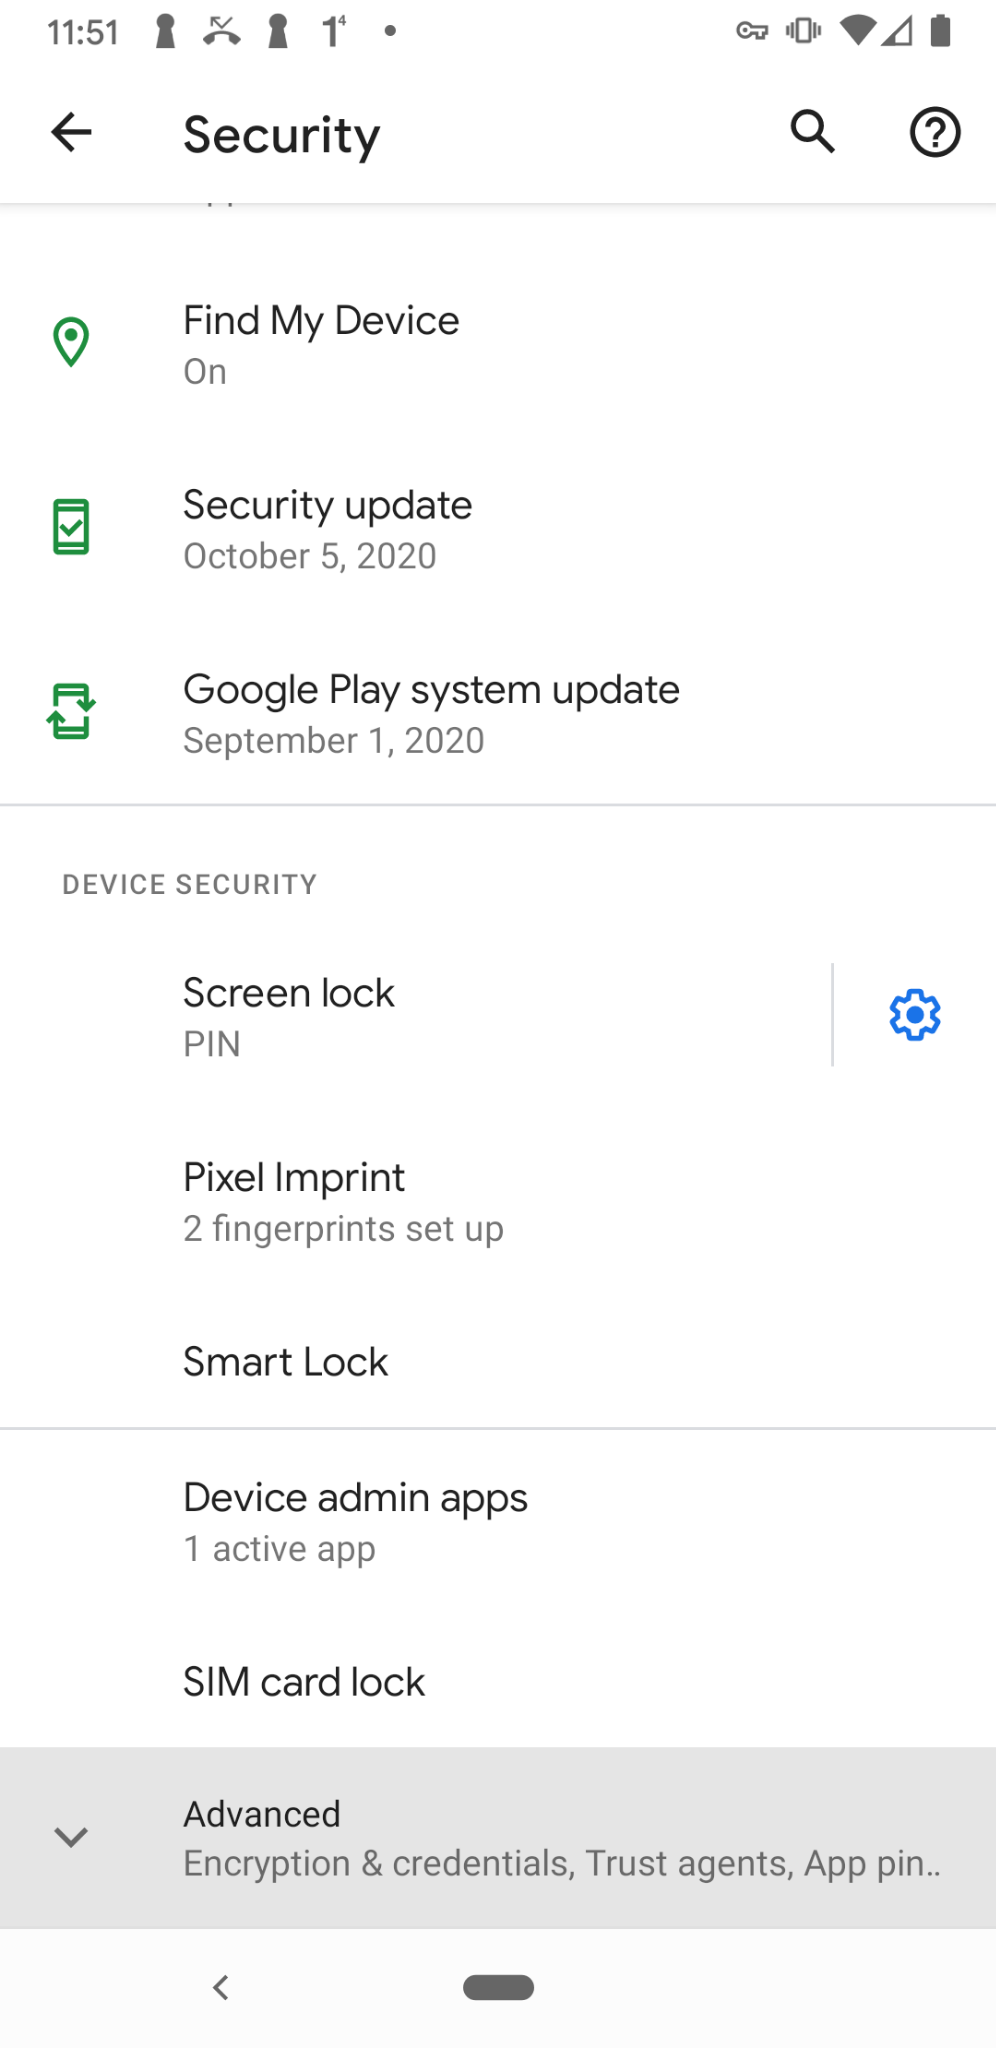
Navigate to Settings > Security.
- Tap Advanced > Encryption & Credentials.
|
|
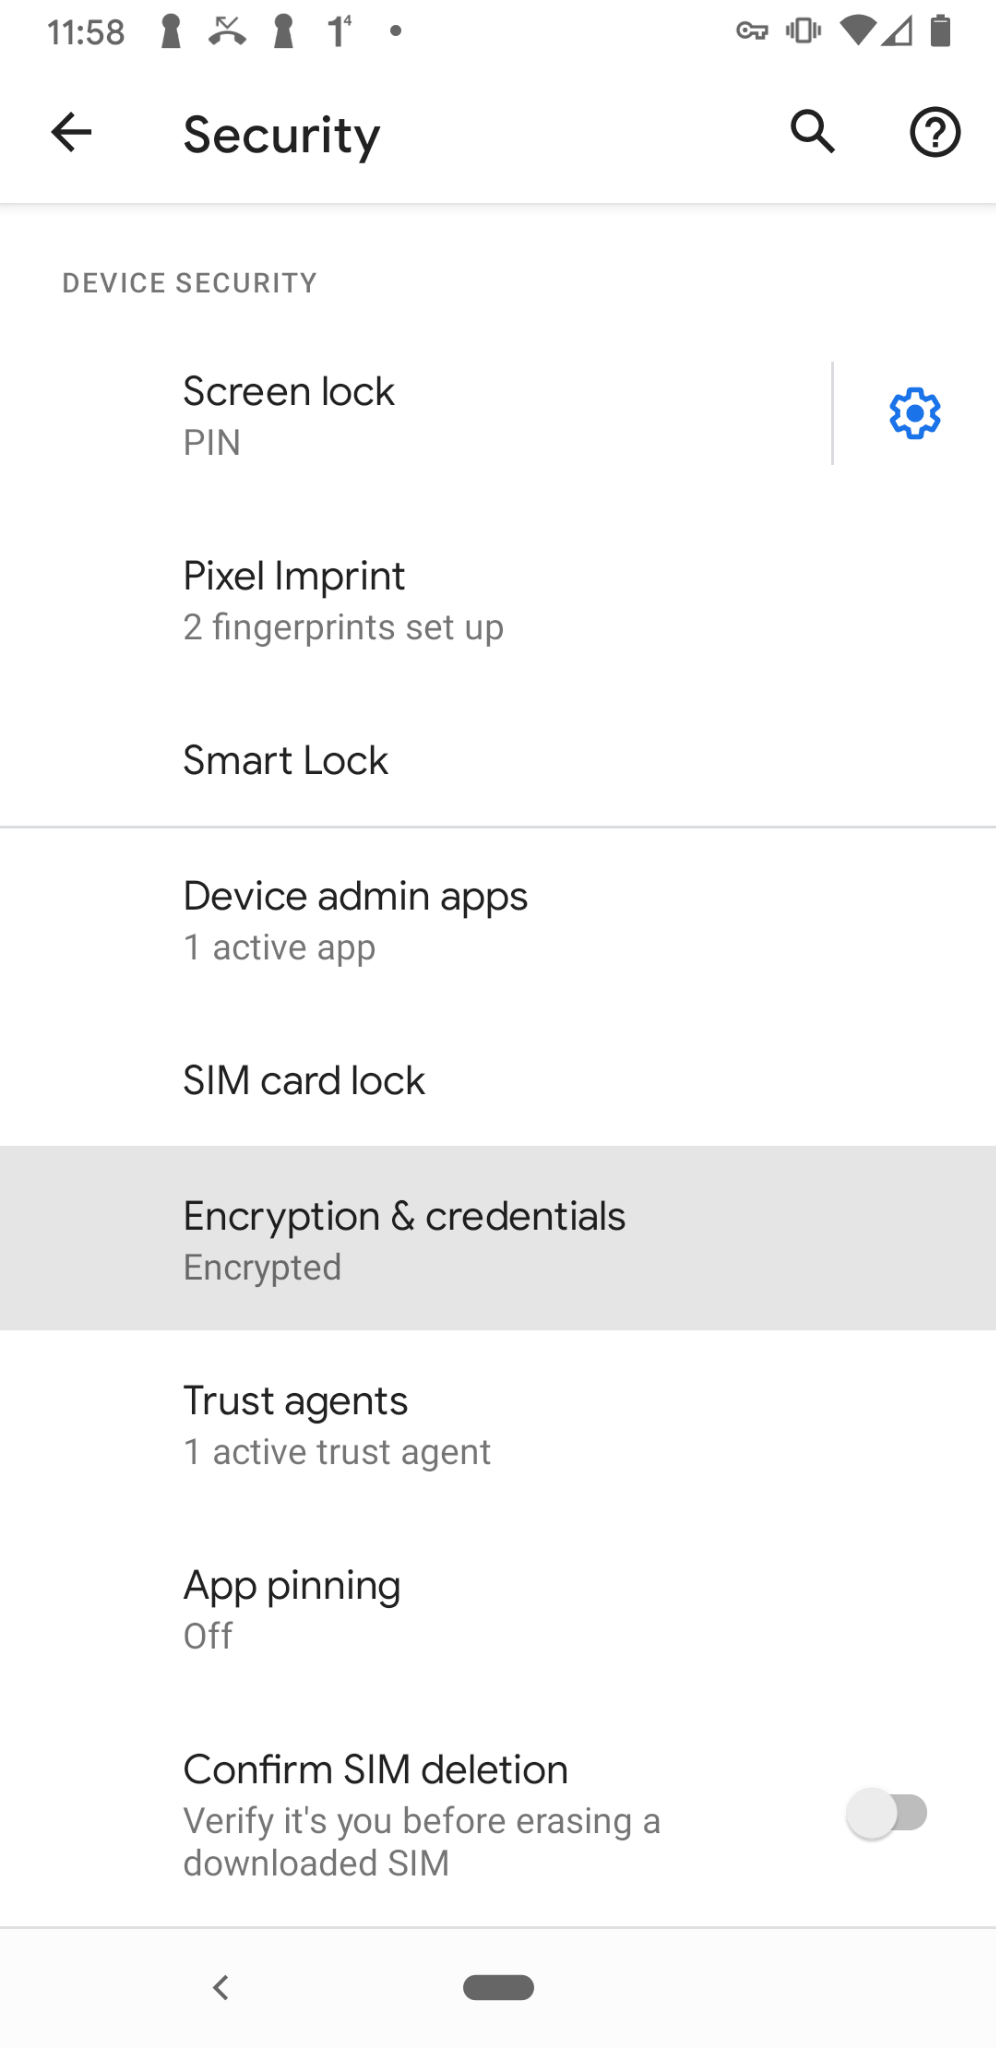
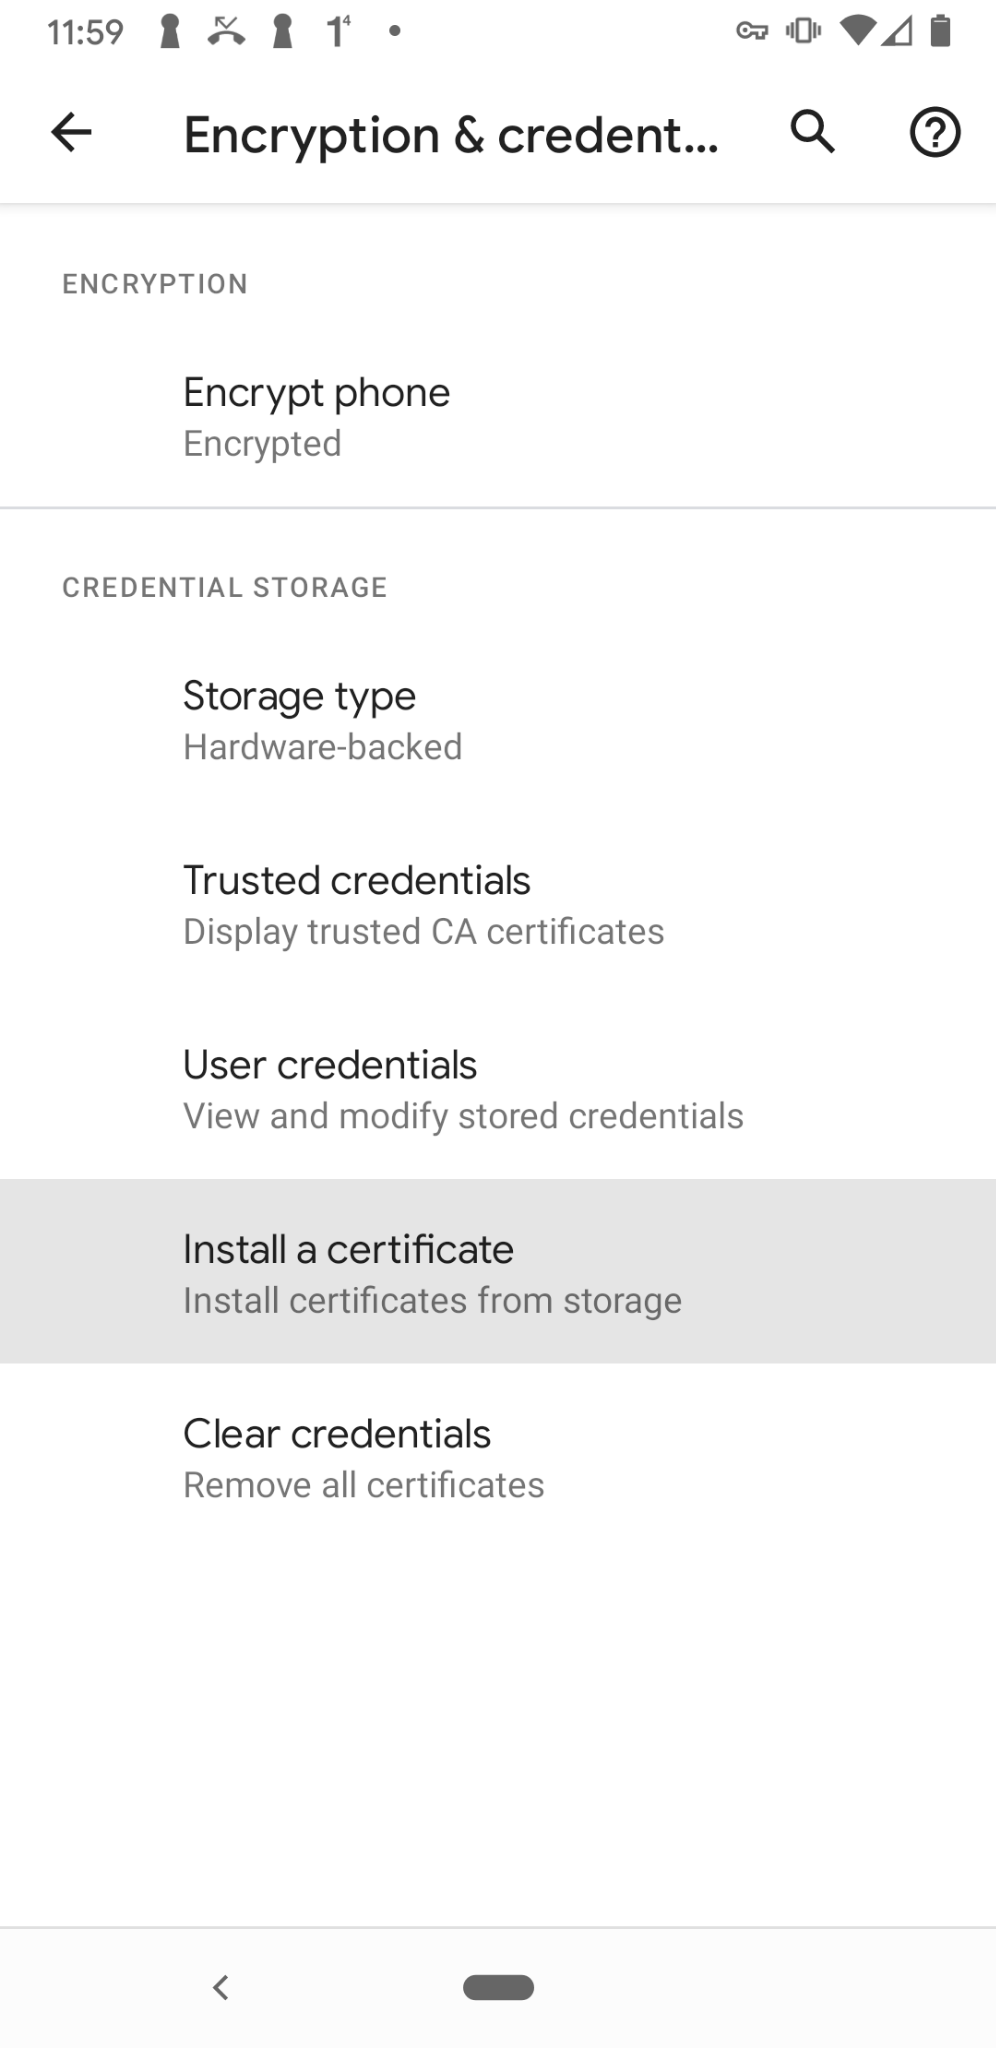
- Tap Install a certificate > CA certificate.
|
|
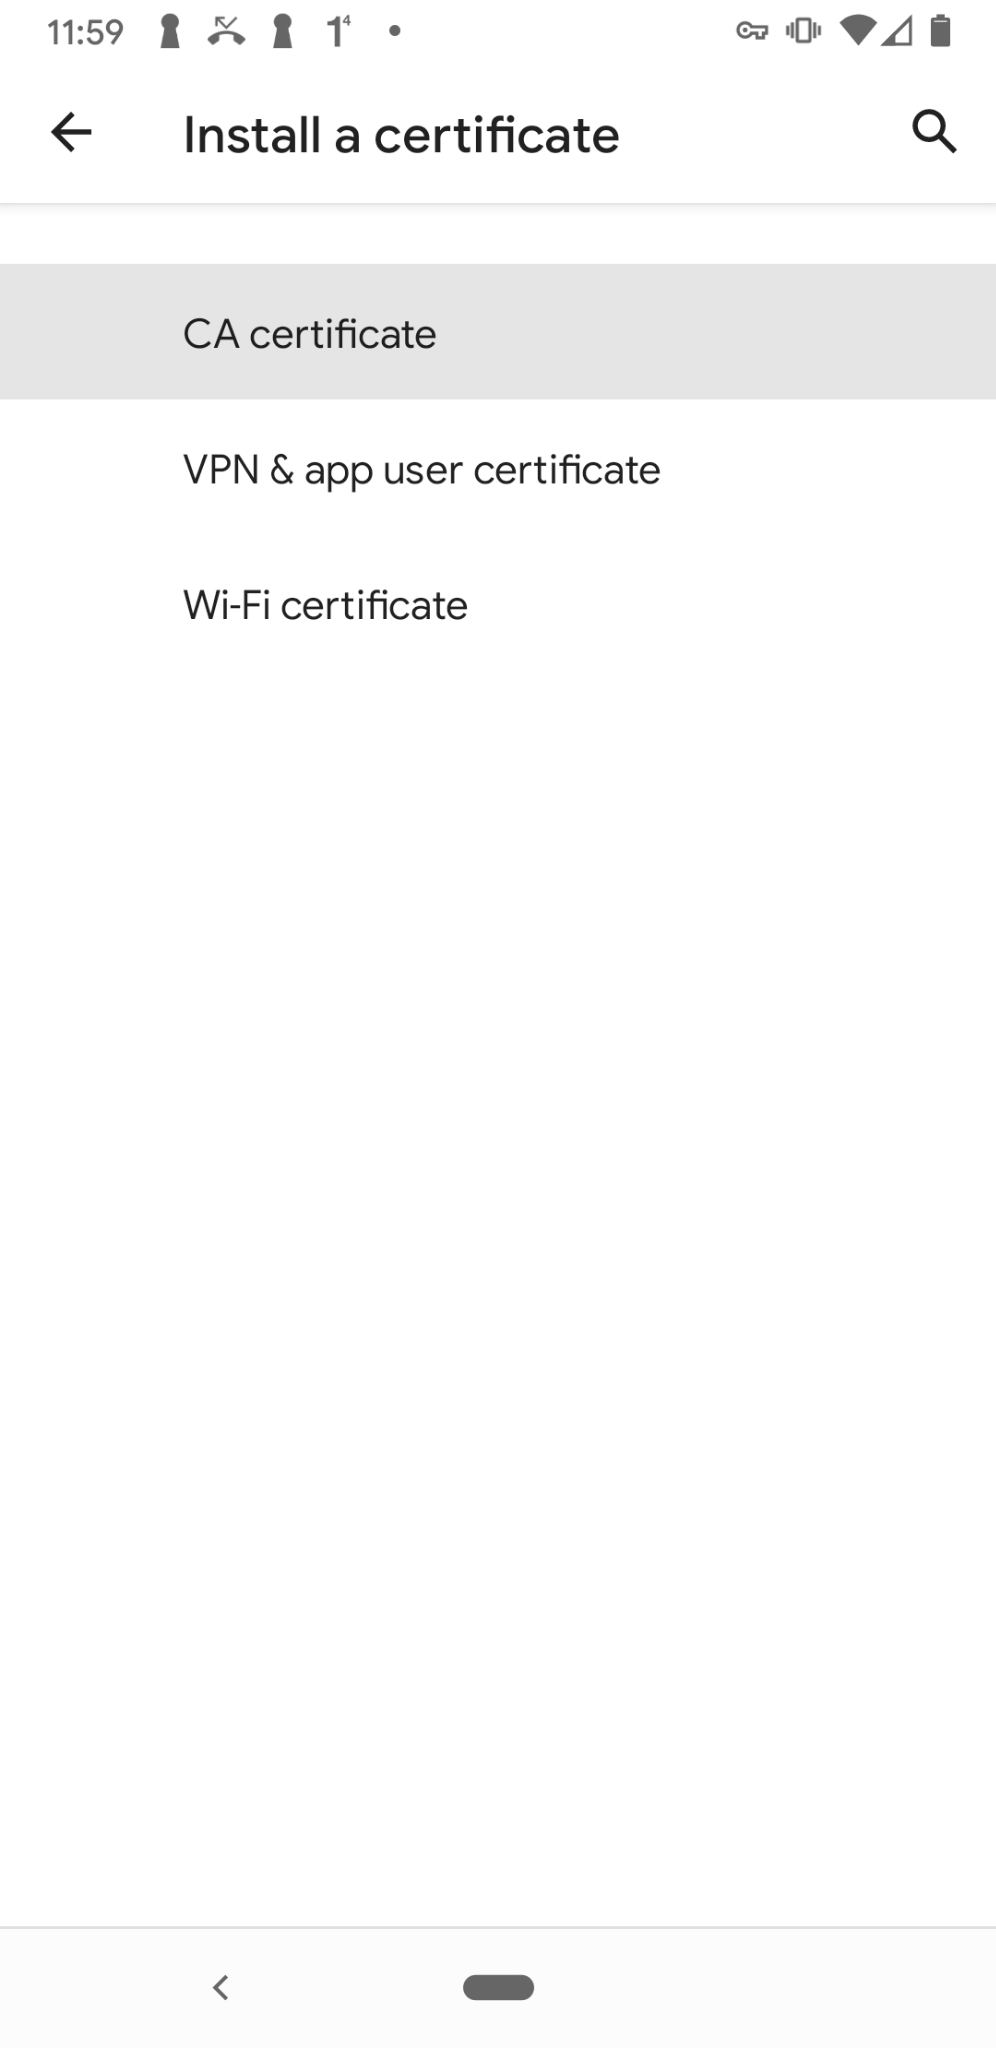
- Tap Install Anyway.

Verify your identity through the fingerprint, or by inserting the pin code.
Select the certificate you want to install.

The root certificate is now installed and ready to be used.
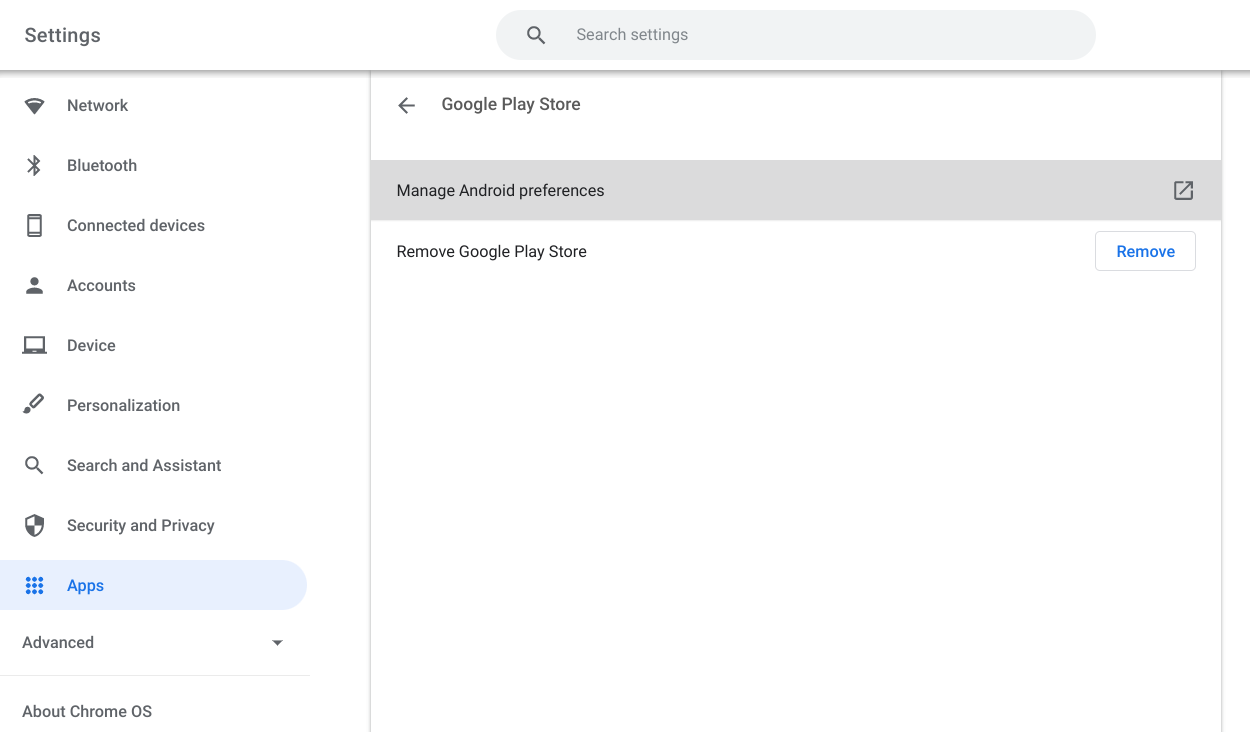
ChromeOS
Navigate to your ChromeOS Settings.
- Navigate to Apps > Google Play Store.
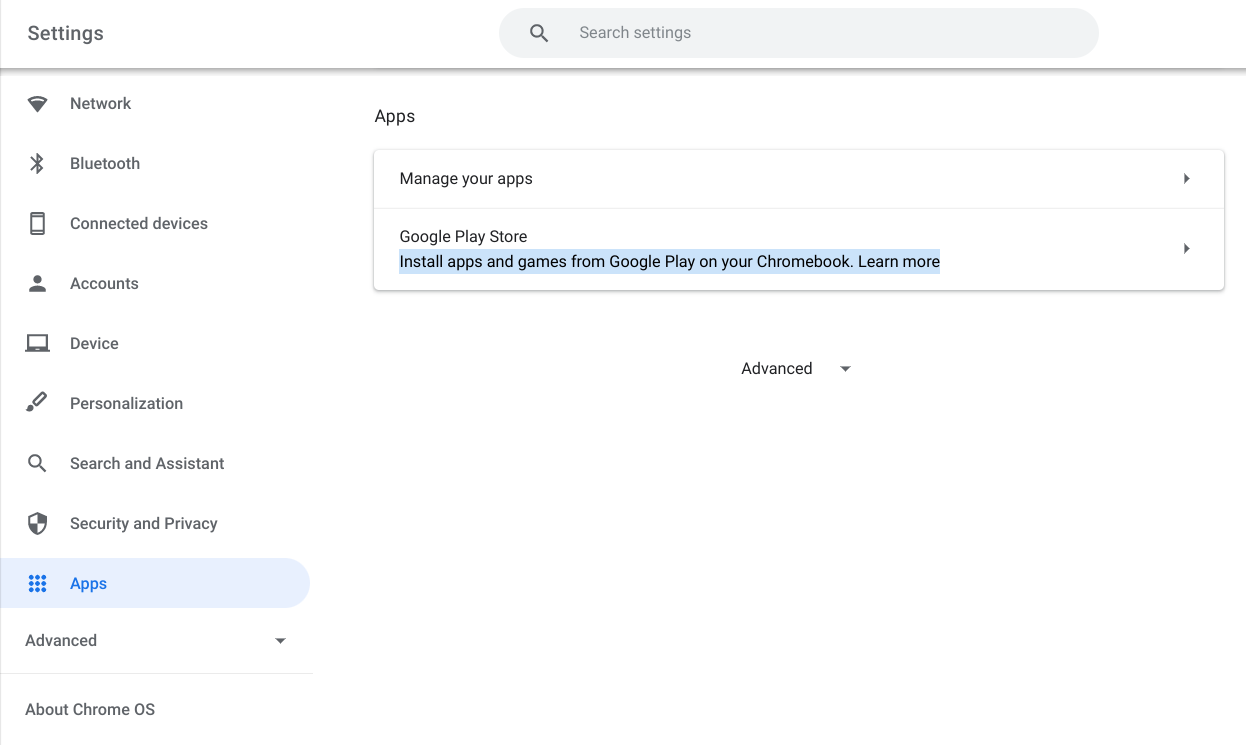
- Click Manage Android preferences.
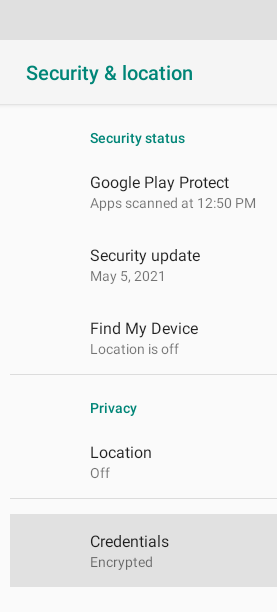
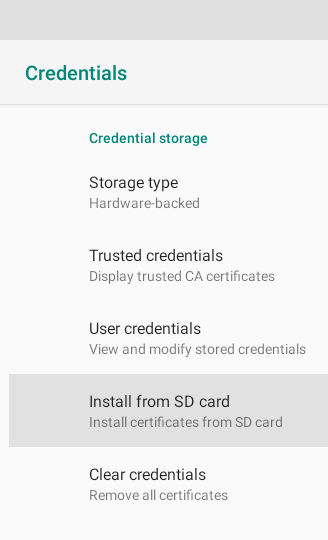
- Navigate to Security & location > Credentials > Install from SD card.
|
|
|

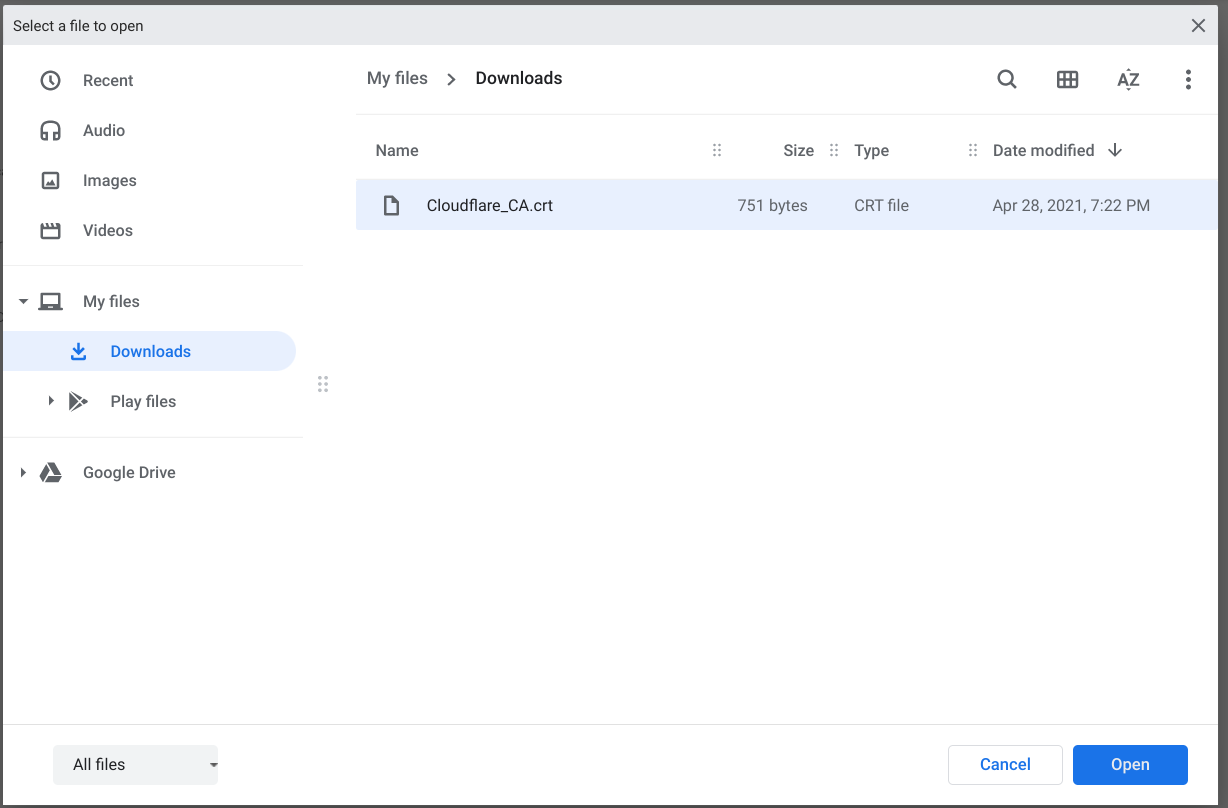
- In the file open dialog, select the
Cloudflare_CA.crtfile downloaded in step #1 and click Open.
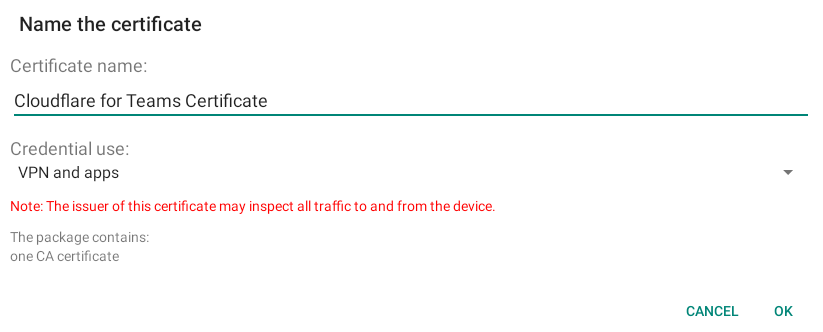
- Enter anything you want for the certificate name and click OK.
Nix and NixOS
nixOS does not use the system certificate store for self updating and instead relies on the certificates found in ~/.nix-profile/etc/ssl/certs or provided by NIX_SSL_CERT_FILE at runtime.
Add the certificate to applications
Some packages, development tools, and other applications provide options to trust root certificates that will allow for the traffic inspection features of Gateway to work without breaking the application.
All of the applications below first require downloading the Cloudflare certificate with the instructions above. On Mac, the default path is /Library/Keychains/System.keychain Cloudflare_CA.crt. On Windows, the default path is \Cert:\CurrentUser\Root.
Firefox
If your organization is using Firefox, the browser may need additional configuration to recognize the Cloudflare certificate. There are several ways you can add your Cloudflare certificate to Firefox. For more detailed instructions, see this Mozilla support article.
Python
Python on Windows
The command to install the certificate with Python on Windows automatically includes PIP and Certifi (the default certificate bundle for certificate validation).
Download the Cloudflare root certificate:
curl -o Cloudflare_CA.crt https://developers.cloudflare.com/cloudflare-one/static/documentation/connections/Cloudflare_CA.crtTo update the bundle to include the Cloudflare certificate, run the following command:
gc .\Cloudflare_CA.crt | ac C:\Python37\Lib\site-packages\pip\_vendor\certifi\cacert.pem
Python on Mac and Linux
Install the
certifipackage:$ pip install certifiIdentify the CA store:
$ python -m certifi~/Library/Python/3.7/lib/python/site-packages/certifi/cert.pemDownload the Cloudflare root certificate:
$ wget https://developers.cloudflare.com/cloudflare-one/static/documentation/connections/Cloudflare_CA.pemAppend the Cloudflare certificate to this CA Store by running:
$ echo | cat - Cloudflare_CA.pem >> $(python -m certifi)If needed, configure system variables to point to this CA Store:
$ export CERT_PATH=$(python -m certifi)$ export SSL_CERT_FILE=${CERT_PATH}$ export REQUESTS_CA_BUNDLE=${CERT_PATH}
Git
Git on Windows
Open Powershell.
Run the following command:
$ git config -l
This command will output:
core.symlinks=false
core.autocrlf=true
core.fscache=true
color.diff=auto
color.status=auto
color.branch=auto
color.interactive=true
help.format=html
rebase.autosquash=true
http.sslcainfo=C:/Program Files/Git/mingw64/ssl/certs/ca-bundle.crt
http.sslbackend=openssl
diff.astextplain.textconv=astextplain
filter.lfs.clean=git-lfs clean -- %f
filter.lfs.smudge=git-lfs smudge -- %f
filter.lfs.process=git-lfs filter-process
filter.lfs.required=true
credential.helper=manager
- The
http.sslcainfodefines the CA Certificate store. To append the Cloudflare certificate to the CA bundle, updatehttp.sslcainfo.
gc .\Cloudflare_CA.pem | ac $(git config --get http.sslcainfo) Git on Mac and Linux
Configure Git to trust the Cloudflare certificate.
$ git config --global http.sslcainfo [PATH_TO_CLOUDFLARE_CERT]
npm
The command below will set the cafile configuration to use the Cloudflare certificate. Make sure to use the certificate in the .pem file type.
$ npm config set cafile [PATH_TO_CLOUDFLARE_CERT.pem]
On some systems you may need to set the following in your path/export list:
$ export NODE_EXTRA_CA_CERTS='[PATH_TO_CLOUDFLARE_CERT.pem]'
Google Cloud SDK
The commands below will set the Google Cloud SDK to use the Cloudflare certificate. More information on configuring the Google Cloud SDK is available here.
Get curl’s
cacertbundle.$ curl -O https://curl.se/ca/cacert.pemGet the Cloudflare CA.
$ curl -O https://developers.cloudflare.com/cloudflare-one/static/documentation/connections/Cloudflare_CA.pemCombine the certs into a single
.pemfile.$ cat cacert.pem Cloudflare_CA.pem > ~/ca.pemConfigure Google Cloud to use the combined
.pem.$ gcloud config set core/custom_ca_certs_file ~/ca.pem
Google Cloud SDK and Kaniko
Per the gcloud documentation, if Kaniko is being used the Cloudflare certificate will need to be installed in the Kaniko CA store. Instructions can be found here.
Google Drive for desktop
To trust the Cloudflare root certificate in the Google Drive desktop application, follow the procedure for your operating system. These steps require you to download the .pem certificate. In the Finder menu bar, go to Go > Go to Folder. Enter Find Append the contents of Apply the newly created root certificate to your Google Drive application. You can verify the update with the following command. In File Explorer, go to Find Append the contents of Update the Google Drive registry key. You can verify the update with the following command.macOS
/Applications/Google Drive.app/Contents/Resources.roots.pem and copy it to a permanent location, such as your Documents folder.cloudflare.pem to the end of roots.pem.Windows
\Program Files\Google\Drive File Stream\<version>\config\.roots.pem and copy it to a permanent location, such as your Documents folder.cloudflare.pem to the end of roots.pem.
For more information, refer to the Google documentation for the TrustedRootCertsFile setting.
AWS CLI
If you’re using the AWS CLI, you need to set the AWS_CA_BUNDLE environment variable to use the Cloudflare root certificate. Commands are available for different operating systems in the instructions available here.
PHP Composer
The command below will set the cafile configuration inside of composer.json to use the Cloudflare root certificate. Make sure to use the certificate in the .pem file type.
$ composer config cafile [PATH_TO_CLOUDFLARE_CERT.pem]
Alternatively, you can add this manually to your composer.json file under the config key.
JetBrains
To install the Cloudflare root certificate on JetBrains products, refer to the links below:
Minikube
Instructions on how to install the Cloudflare root certificate are available here