Add locations
DNS locations are usually physical entities like offices, homes, retail stores, movie theatres, or data centers. The fastest way to start filtering DNS queries from a location is by changing the DNS resolvers at the router.
To add a DNS location to Gateway:
In Zero Trust, navigate to Gateway > DNS Locations.
Select Add a DNS location.
Choose a name for your DNS location.
Cloudflare will prefill the Source IPv4 Address based on the network you are on. Enterprise customers have the option of manually entering IPs.
You do not need the IPv4 address field if:
- Your DNS location only uses IPv6.
- Users will be sending all DNS requests from this location using DNS over HTTPS via a browser.
- You will be deploying the WARP client.
If any of the above apply to your case, select Delete.
(Optional) Toggle the following settings:
Set as Default DNS Location sets this location as the default in your DNS policy builder.
Enable EDNS client subnet sends a user’s IP geolocation to authoritative DNS name servers.
EDNS client subnet (ECS) helps reduce latency by routing the user to the closest origin server. Cloudflare has enabled EDNS in a privacy preserving way by not sending the user’s exact IP address but rather a /24 range which contains their IP address.
Select Add DNS location.
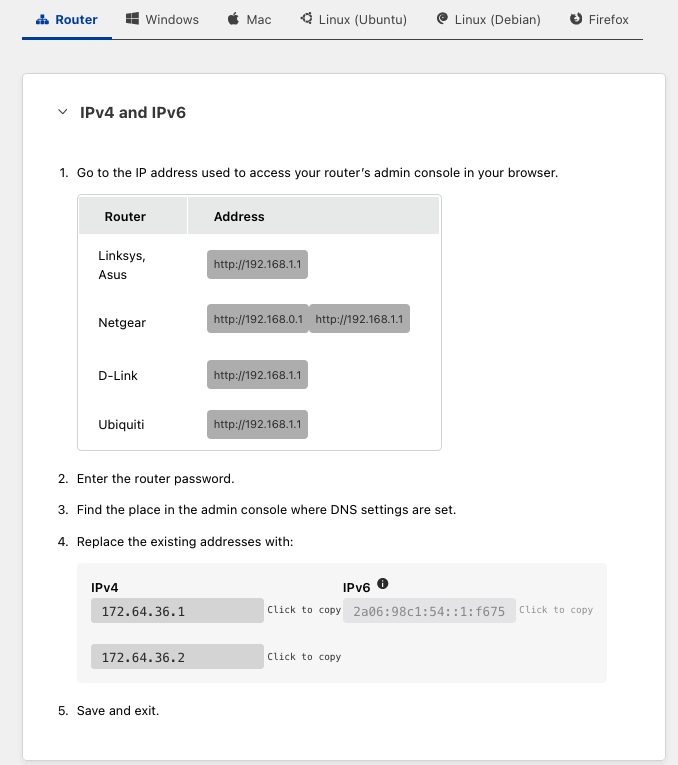
Change the DNS resolvers on your router, browser, or OS by following the setup instructions in the UI.
Select Done. Your location will appear under Gateway > DNS Locations.
You can now apply DNS policies to your location using the DNS Location selector.